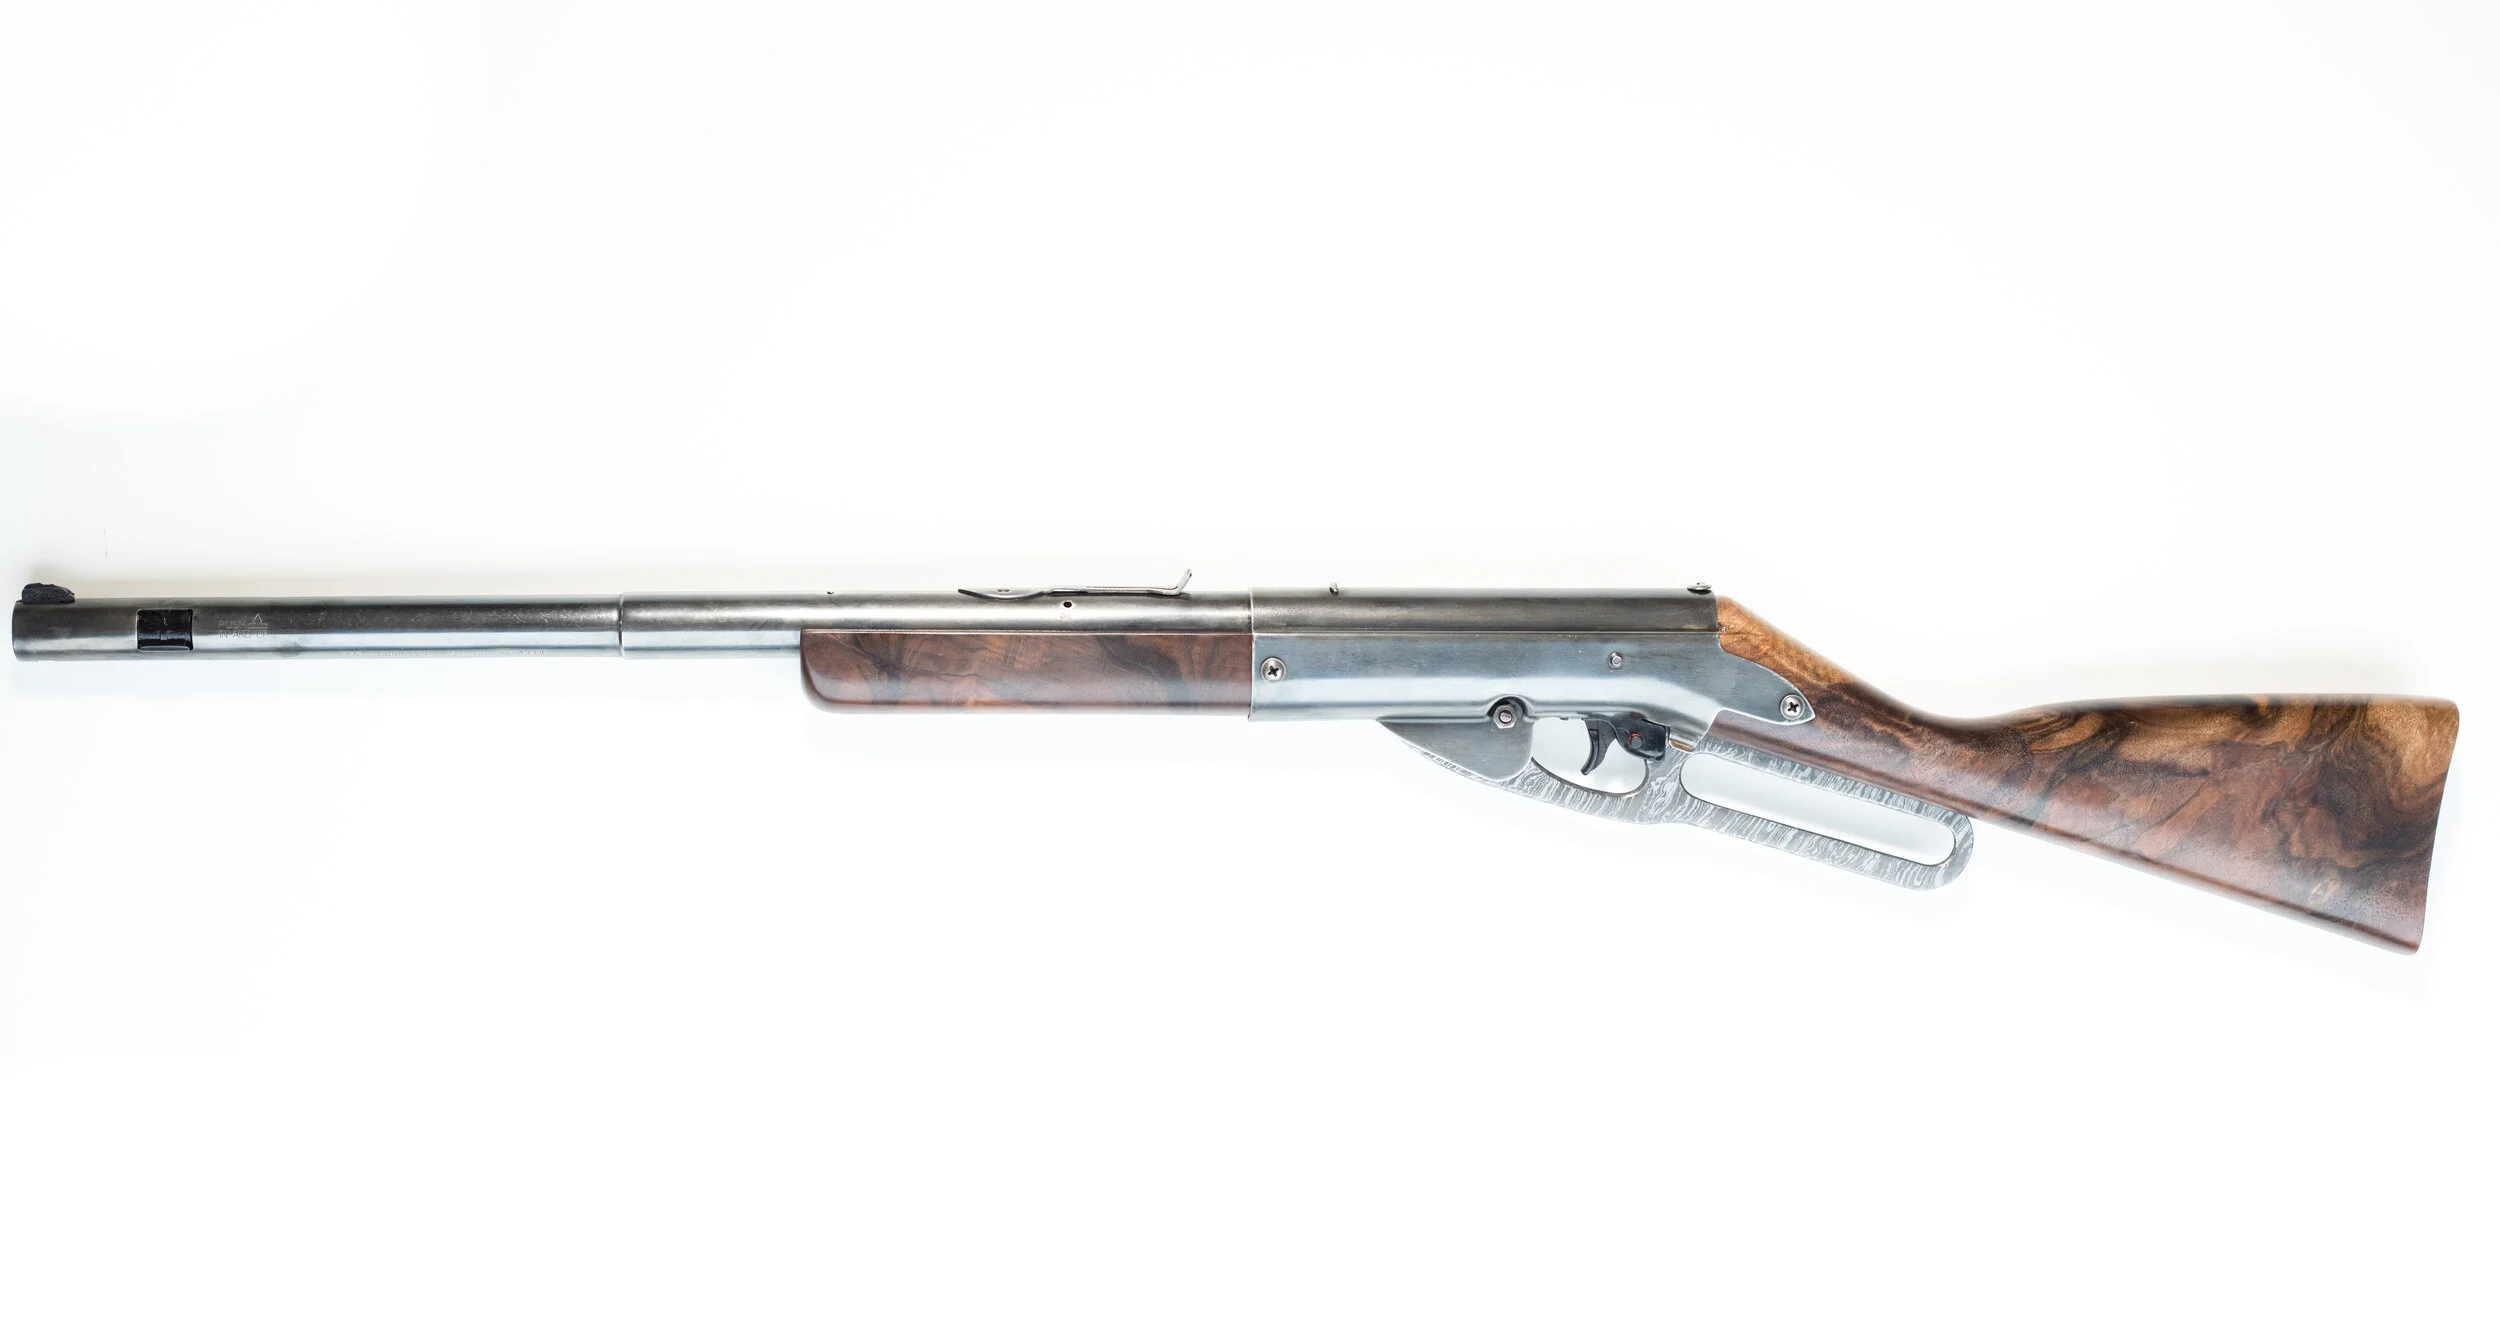
Vintage Daisy Red Ryder Restoration
This is a follow up to my Youtube video where I did a way-too-expensive restoration of my old Daisy BB gun. I know the title says Red Ryder, and my gun wasn’t actually a Red Ryder, But ever since that Christmas story kid shot his eye out, everyone remembers Red Ryder and forgets about Daisy.
I had a pretty comprehensive list of tools and materials for this build. For your ease of searching/referencing I’ll add a link to everything here. Items listed in roughly the order I used them.
3M mask
Starting point
While I’m not the most sentimental guy. I did get this old Daisy when I was eight. Somehow I’ve been able to keep it for all this time. It still works as good as ever somehow. It isn’t quite a factory finish though. Back in high school it got left out in the rain, so I stained the wood and painted the steel. Not the best restoration, but was as good as I could do at the time. If you are wondering how much one of these are worth, I’ve seen news ones as low as $17. And I spent more than that on sandpaper for this build. So no, there is absolutely no justifying this entire process.

Paint stripper after just a few minutes
stripping the paint
This was remarkable easy. Make sure to PPE up though. I had gloves, respirator, and goggles. I’d never used paint stripper before. So I went and got some harsh stuff from Home Depot and brushed in on with a disposable brush. It says to let sit for 15 minutes, but I could see the paint peeling back in just a minute or two. It basically wiped right off with the same brush. When I was done I cleaned it thoroughly with denatured alcohol. After it was completely clean I scuffed it with 0000 steel wool. Any scratched areas I sanded with 600 grit sandpaper.
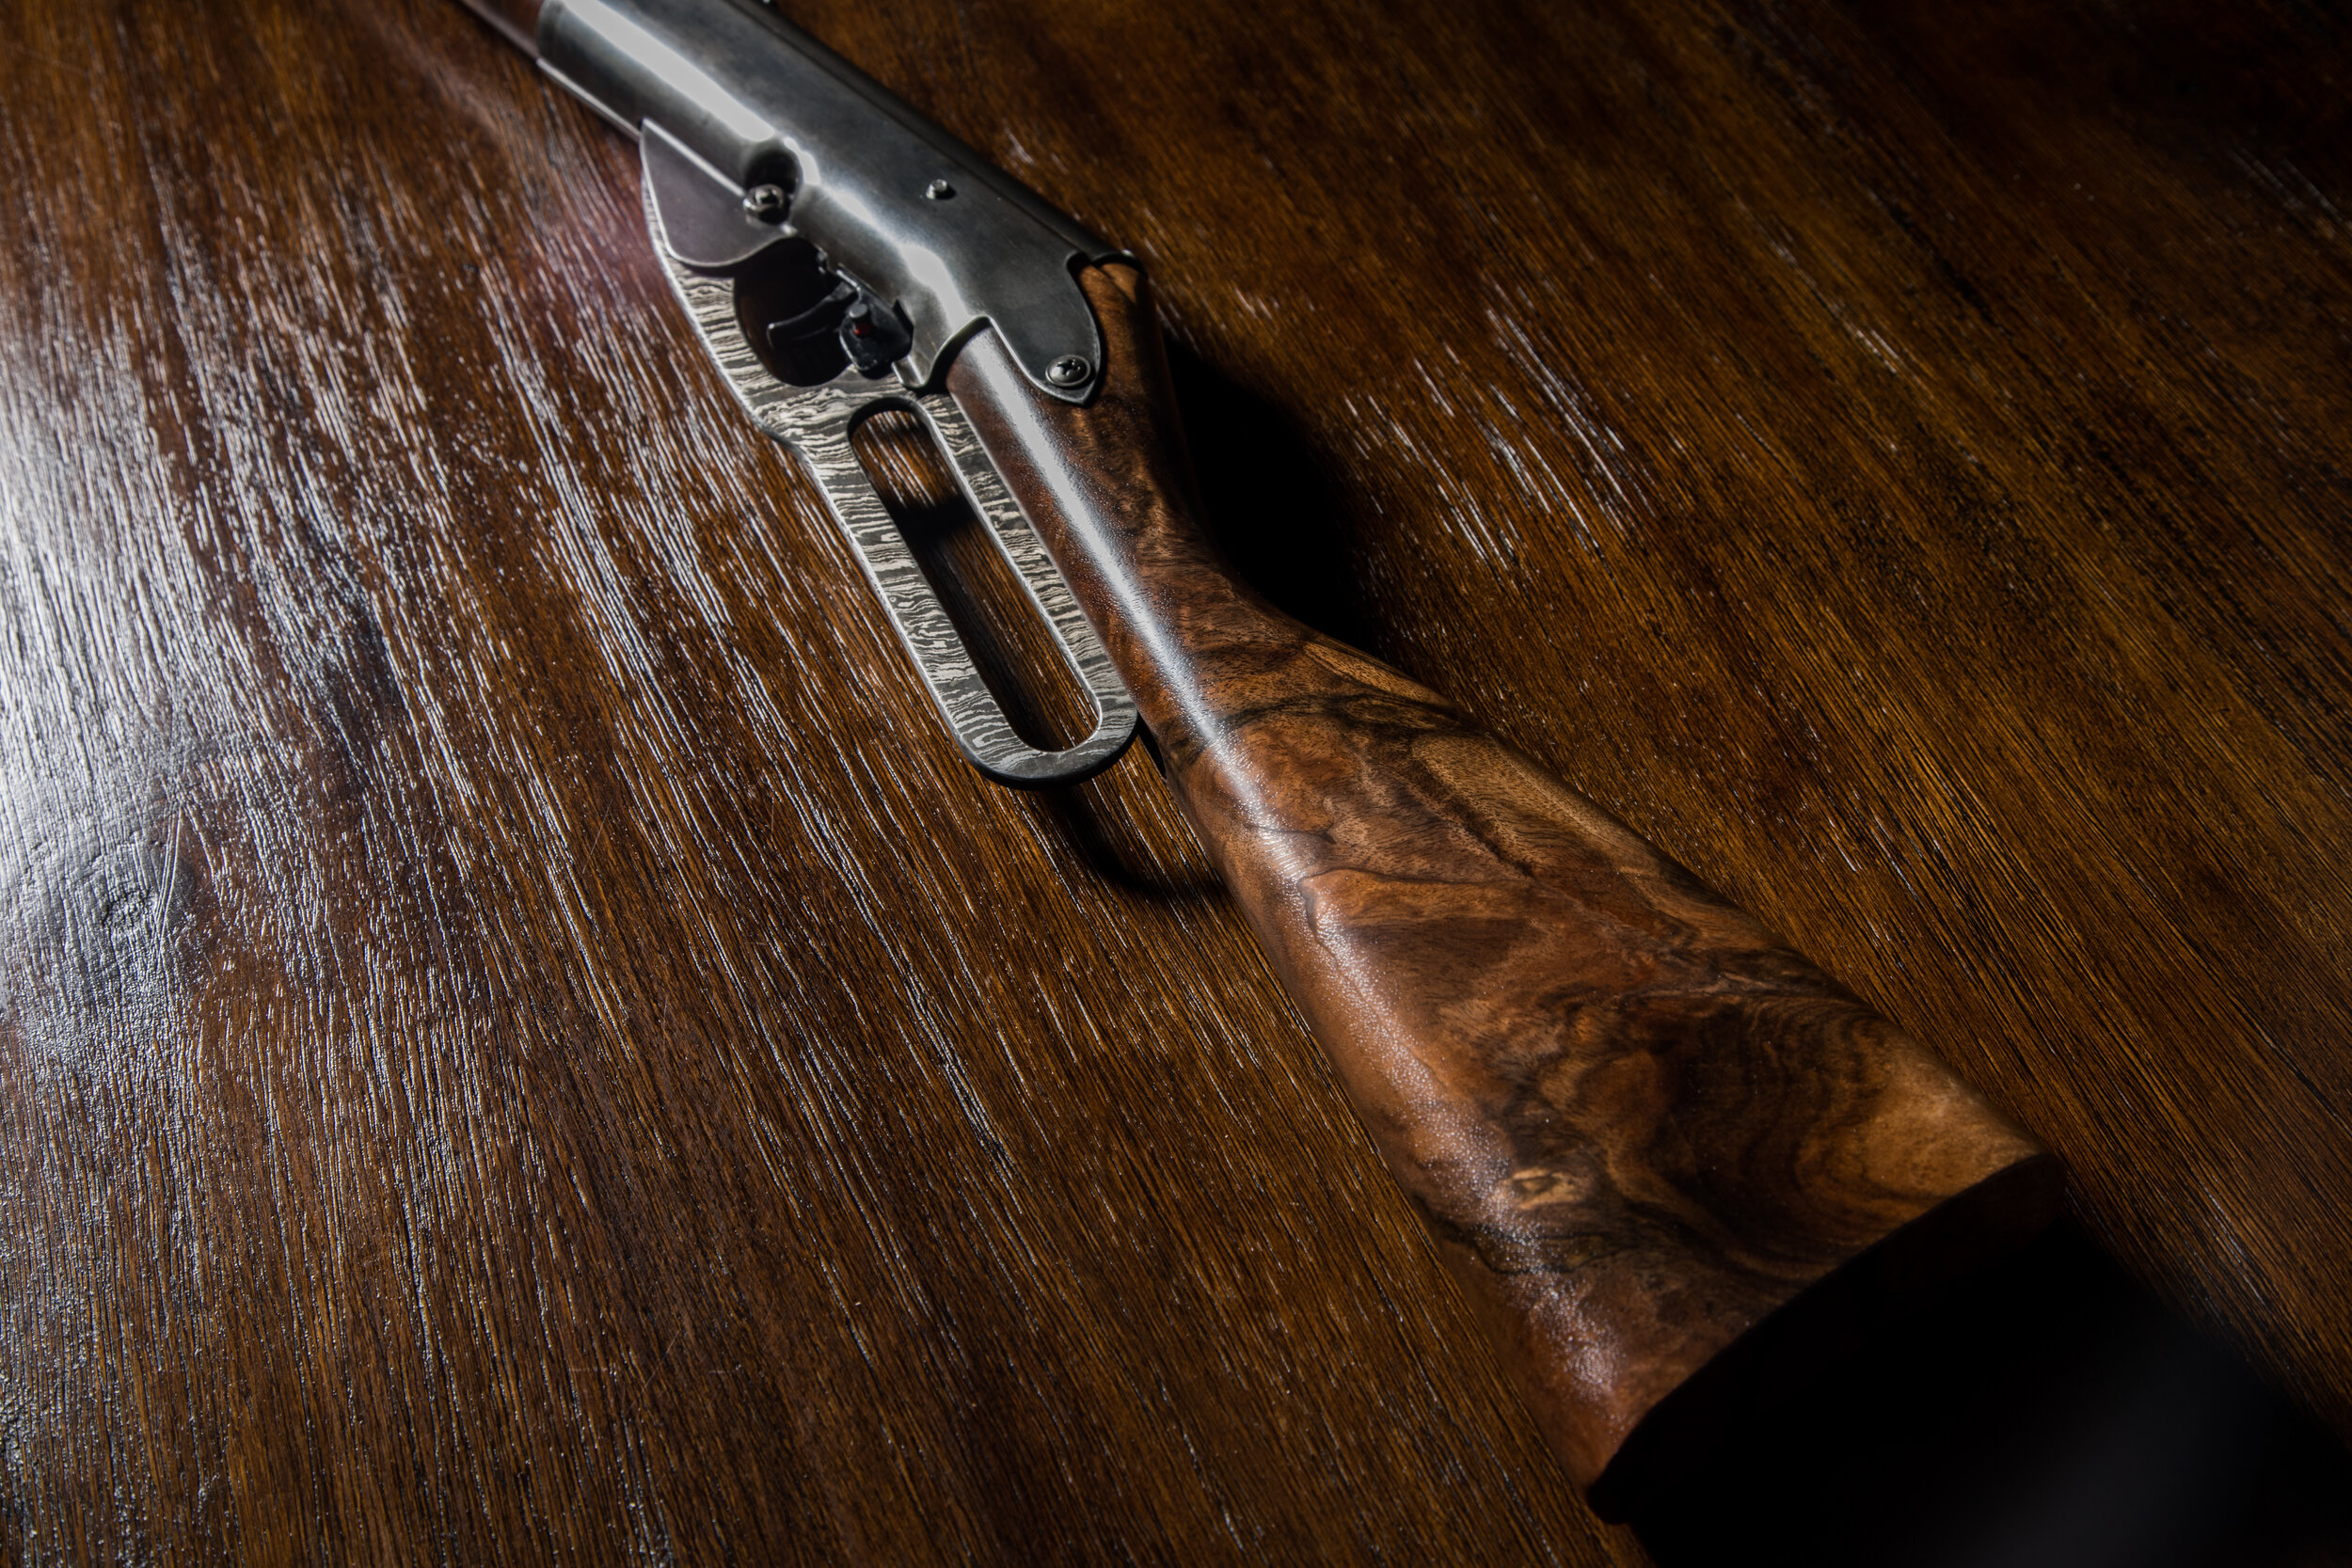
The Wood
English Walnut chink doesn’t look like much yet
I spent way too much on this project as it is. So I wanted to keep costs down where ever I could. One place I could save was by using scrap wood from my past projects. Like a lot of people, I save almost all of my useless off-cuts. Always telling myself that someday I’ll find the perfect project for that one random chunk. Well my time finally came. I had a completely random piece of English walnut graft that really couldn’t be used for anything. Somehow it happened to be perfect for a BB gun stock though. As it turns out, this type of English Walnut is actually some of the most sought after and expensive gun stock material in the world.
copying the old stock
To get it exactly the size of my old one, I made a plywood copy of the original using double side tape and a flush trim bit in my router table. I then took the plywood copy and used that to transfer the shape to my chunk of English Walnut. This really was pretty easy. If you aren’t sure how to make a template and copy your piece, definitely check out my Daisy restoration video. It’ll be crystal clear after watching that portion.
Matching the edge to the original
This part was actually pretty easy. As it turns out, the original Daisy has a 5/8” radius round over edge. So that is what I used. I’ve had good luck with Freud and Whiteside bits if you are interested. Don’t go cheap on bits, they never last. Any spots that didn’t look quite perfect when I was done I smoothed out with my rasps.
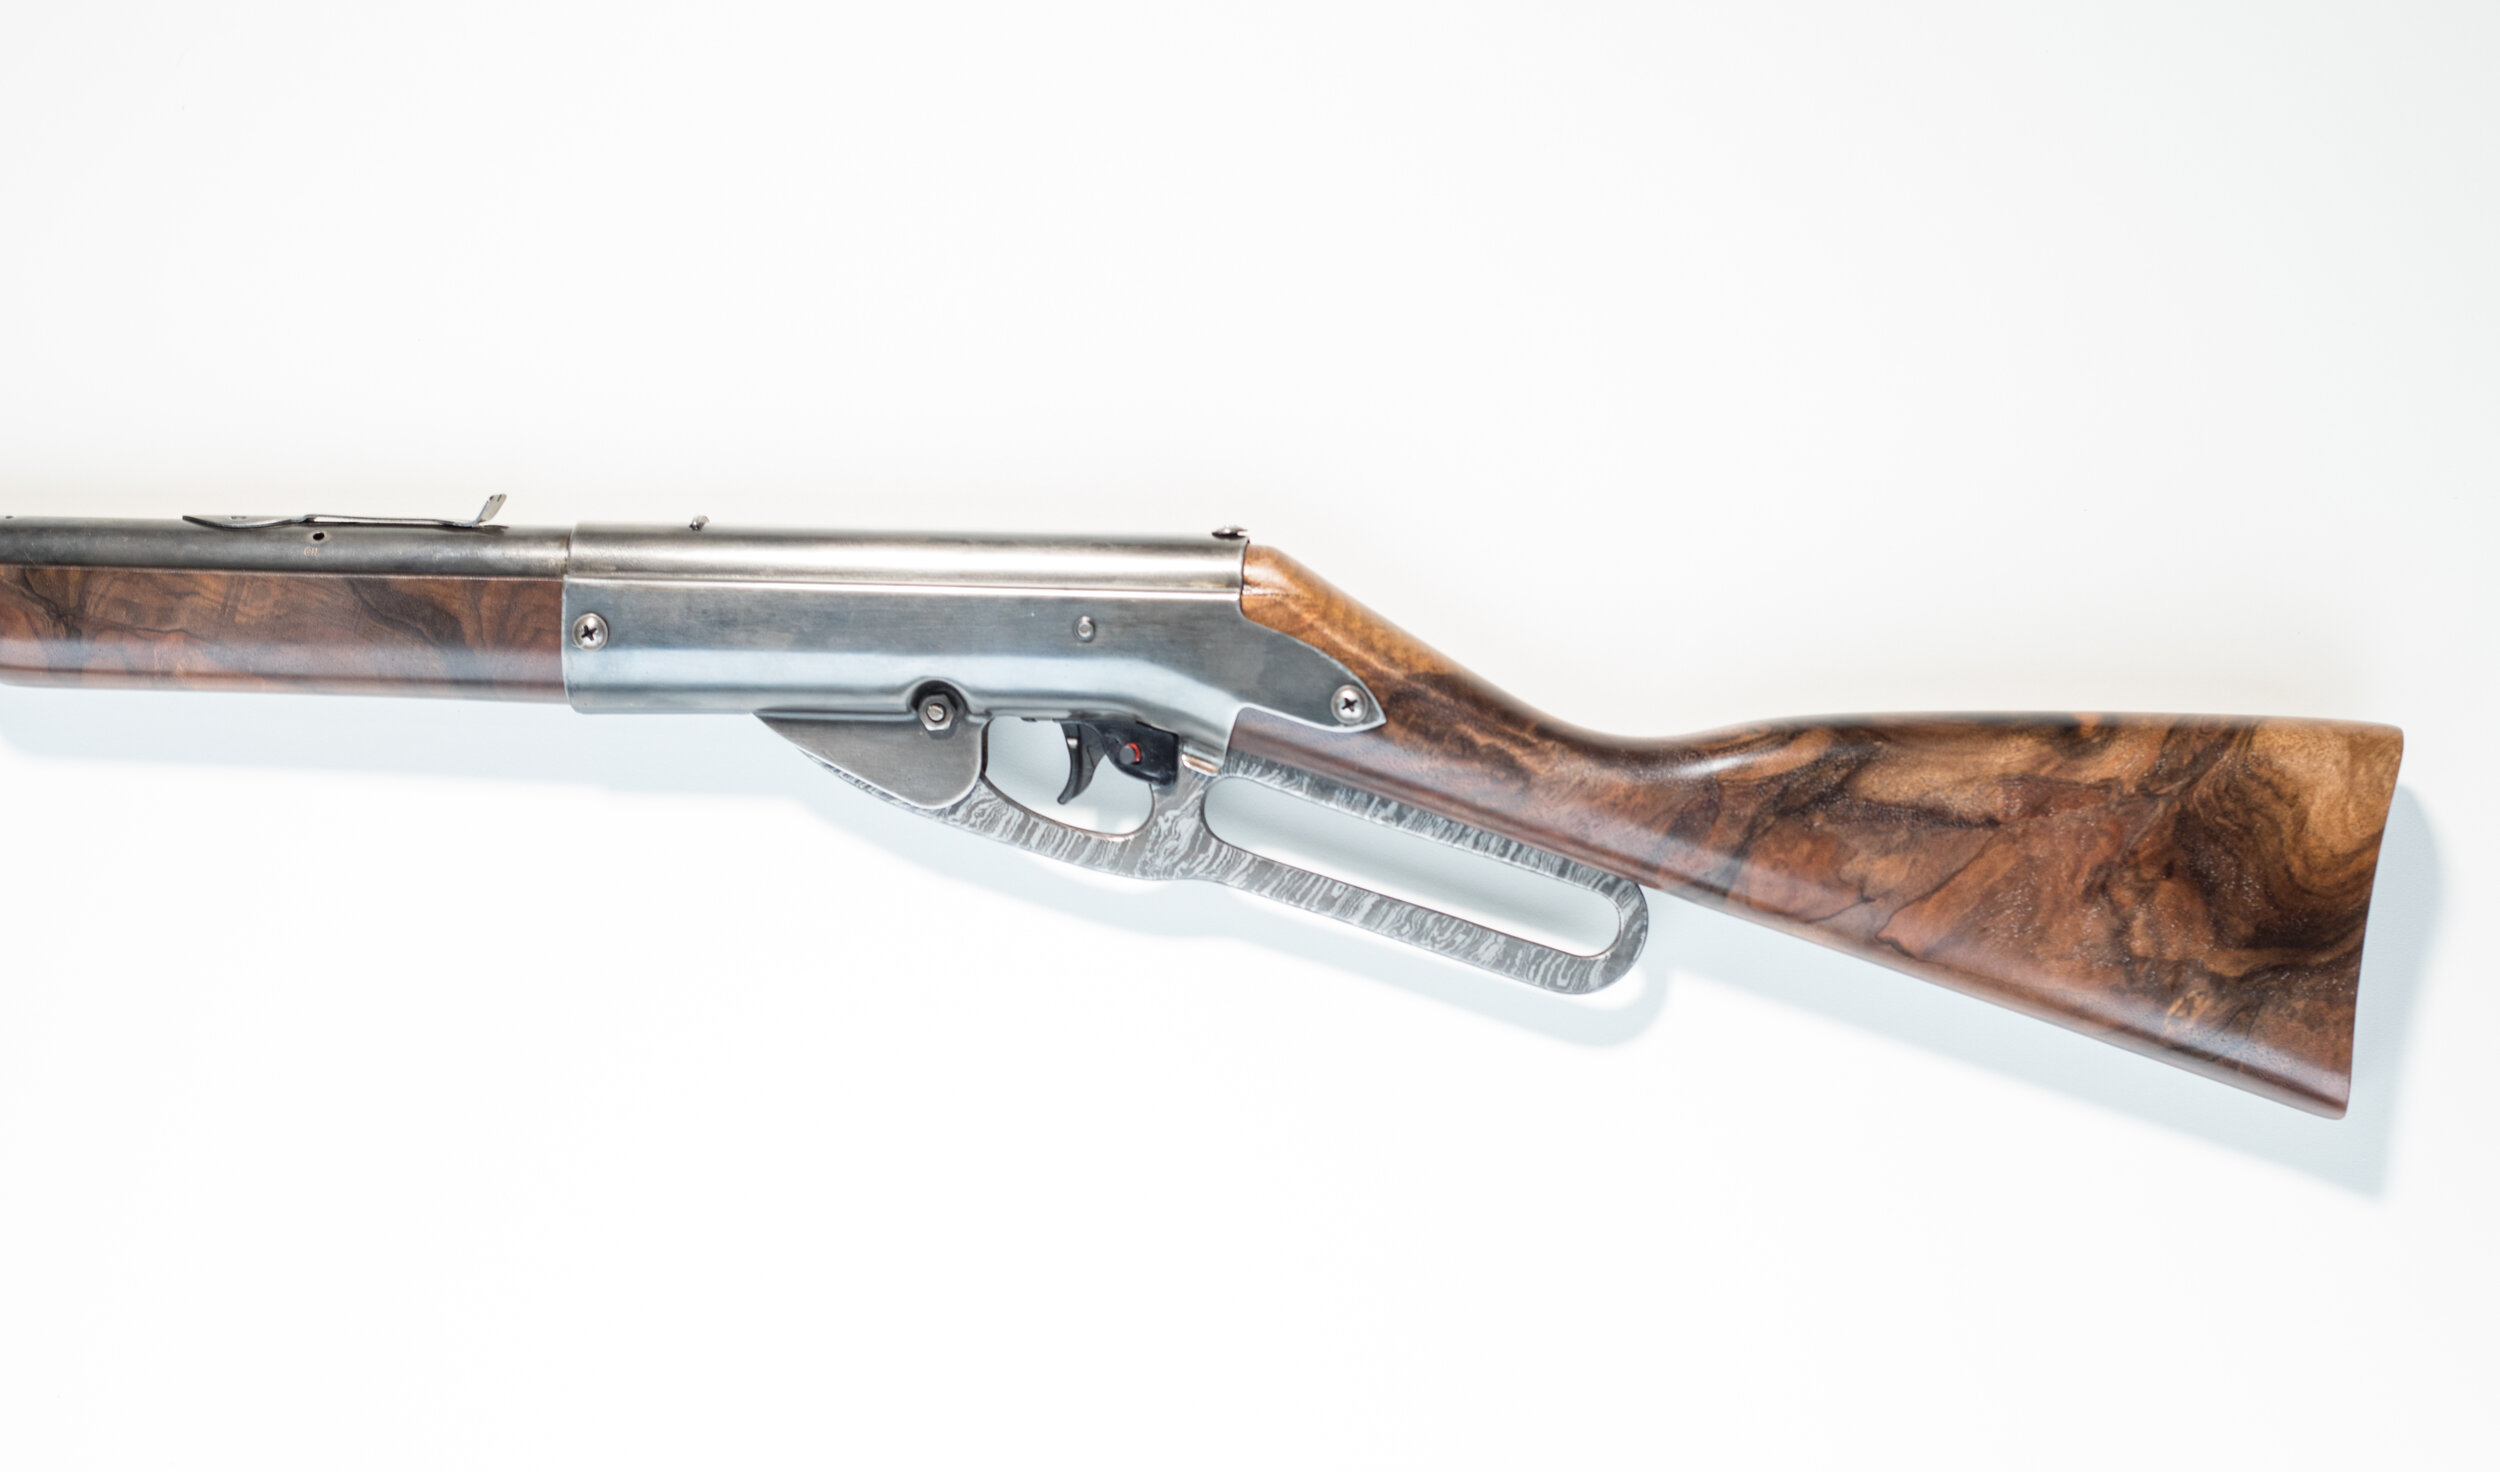
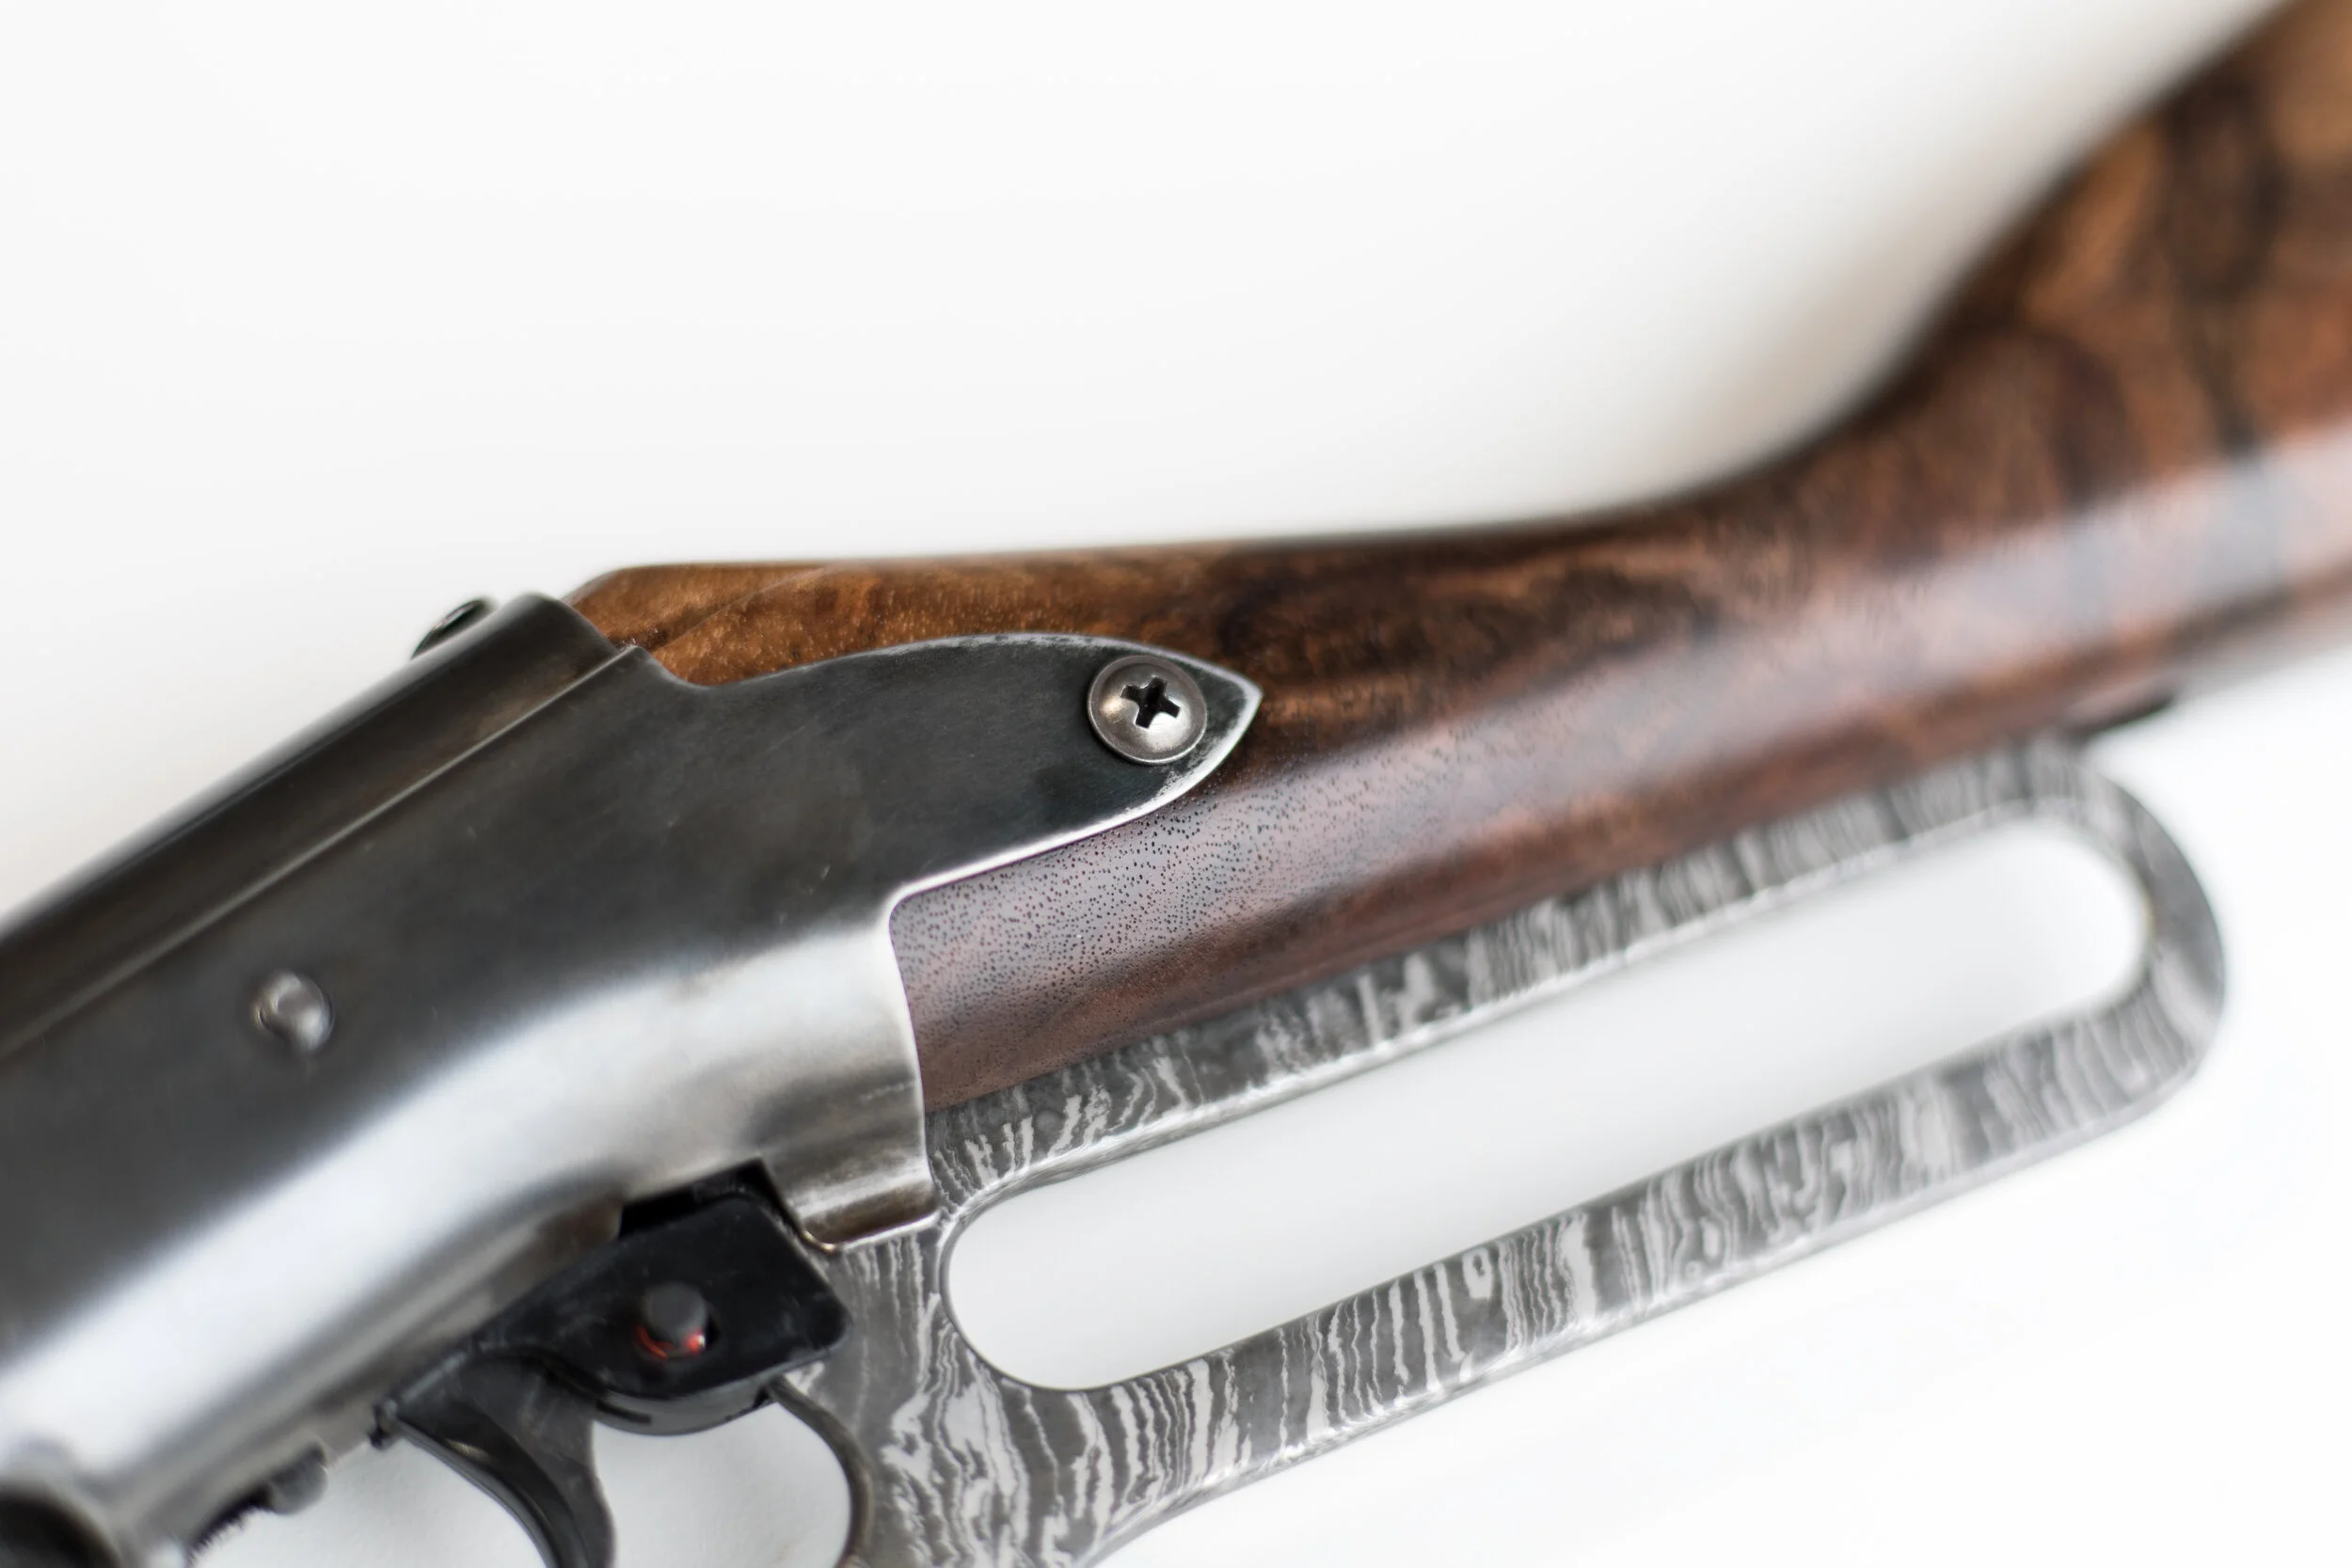
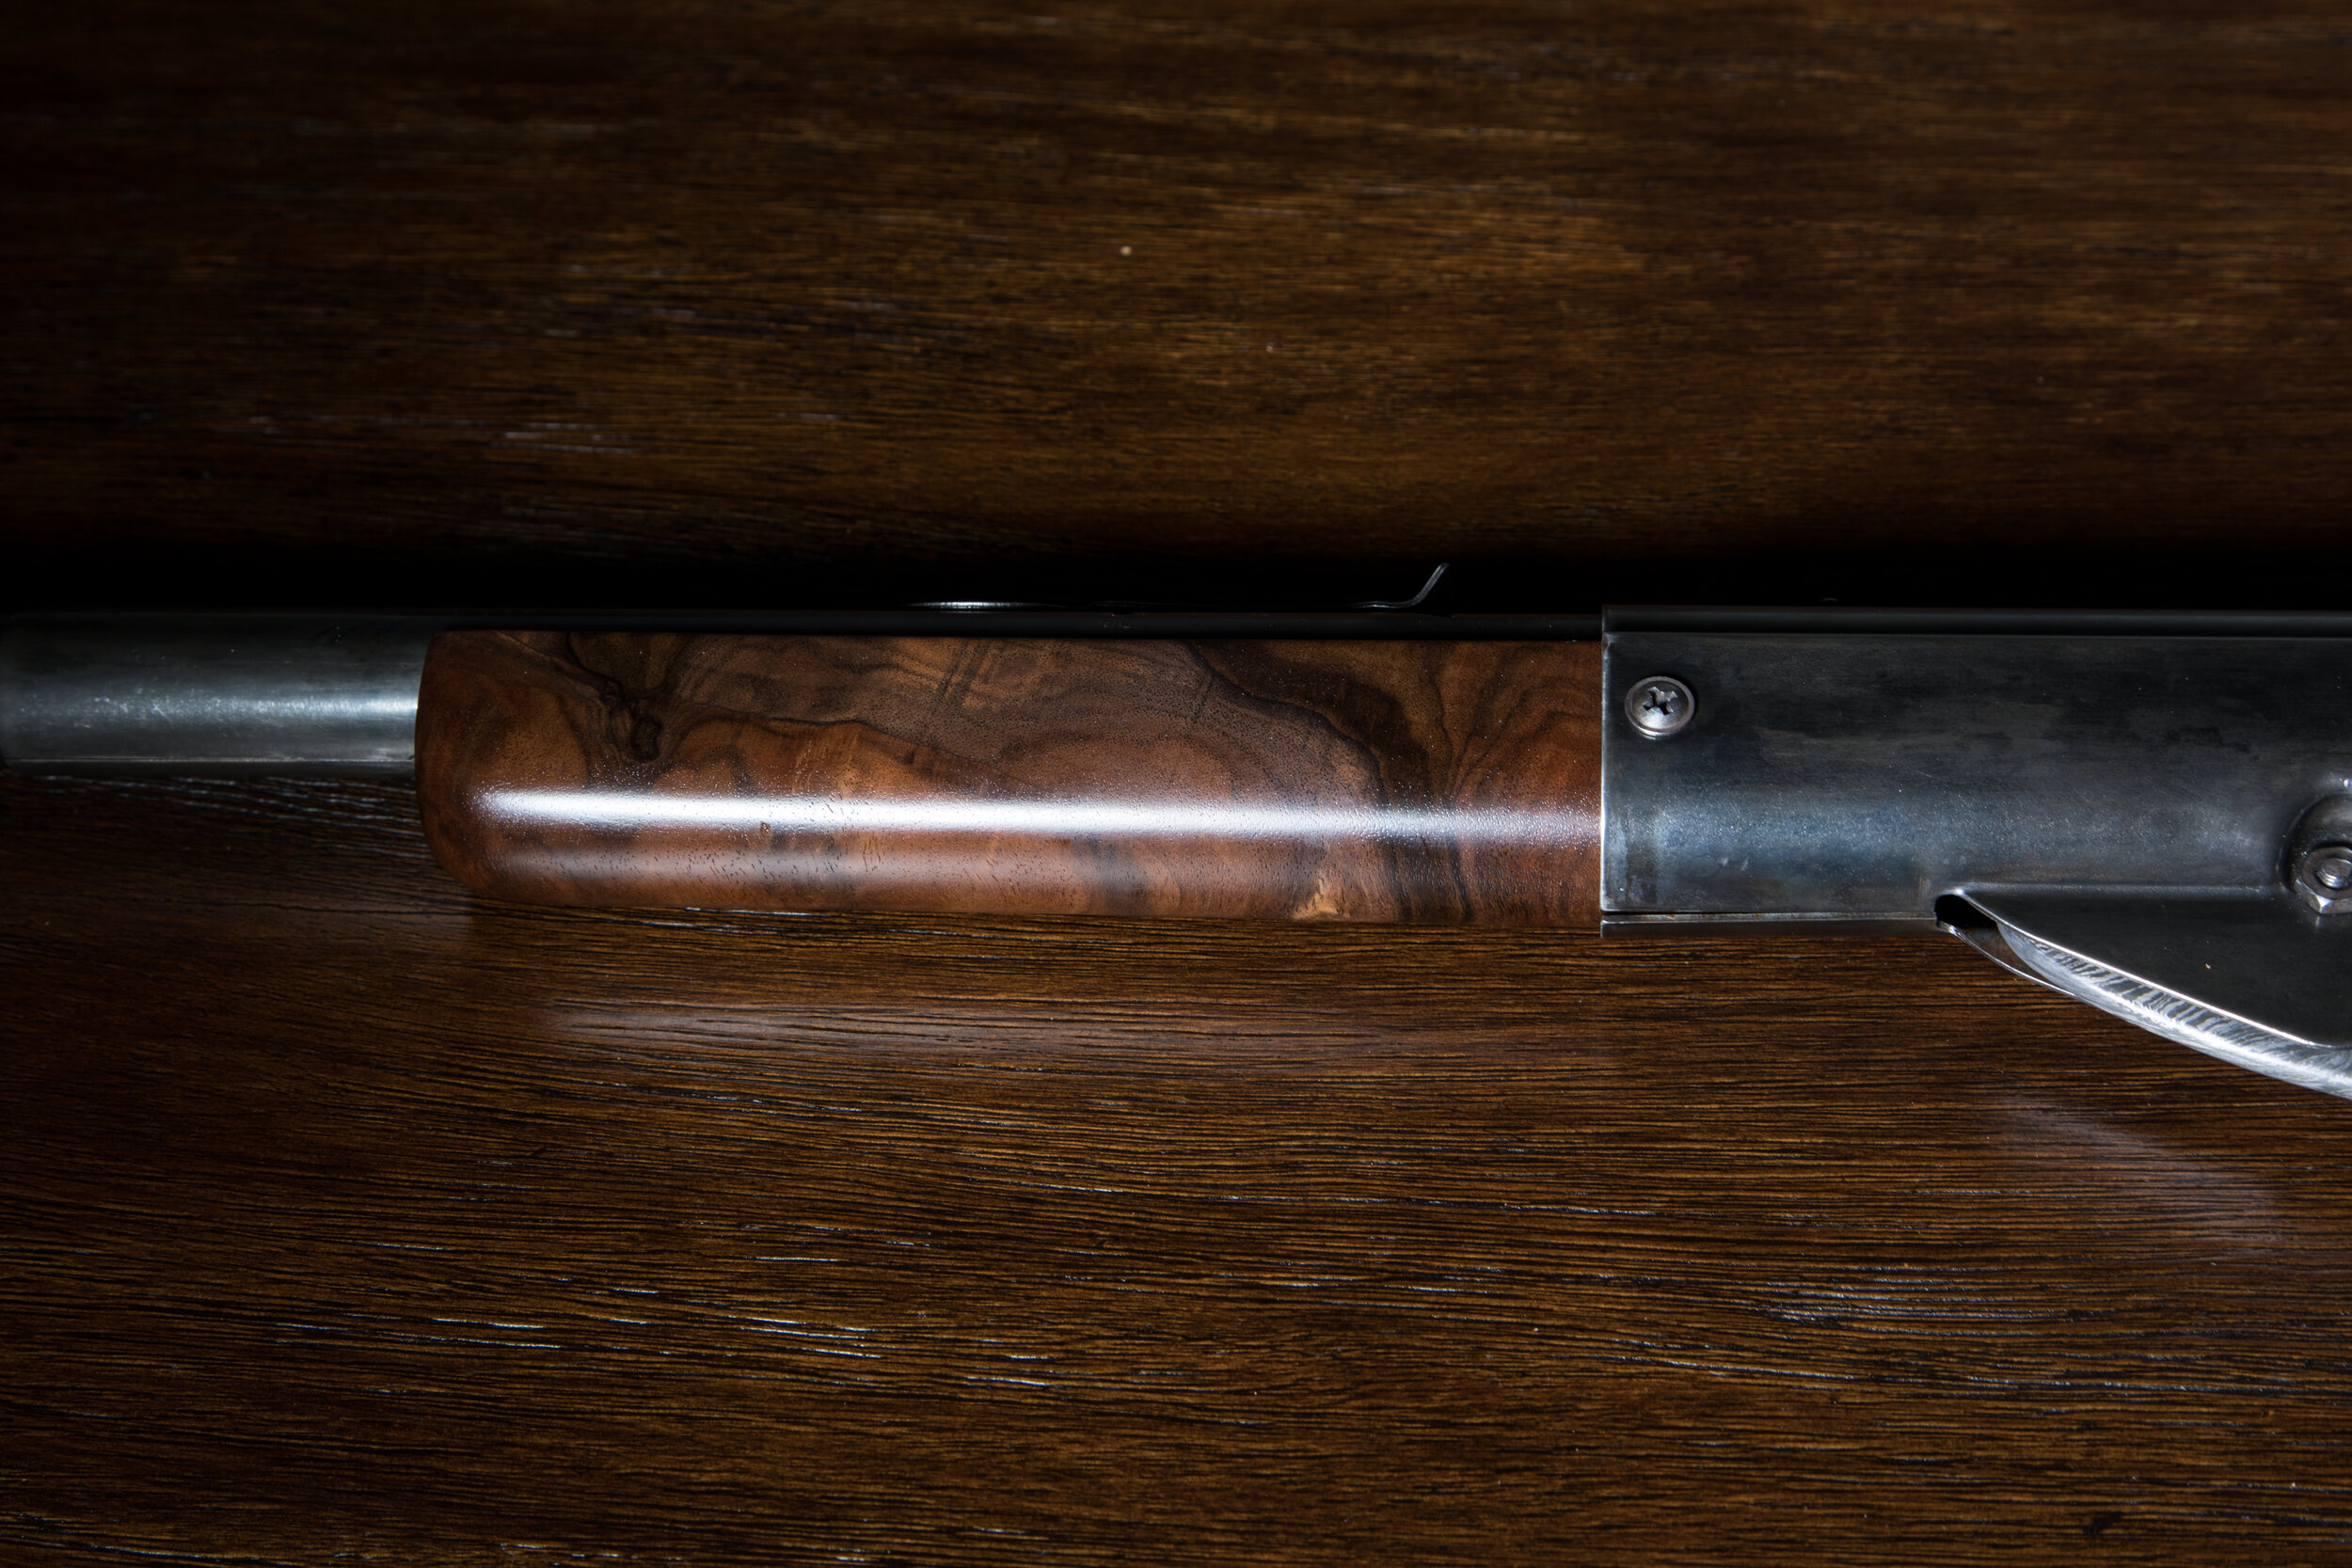
Foregrip
For the foregrip I just cut a square piece the width of the orignal (1.25x1.25). I then used the same 5/8” round over bit for the bottom. The barrel was 1” in diameter, so for the top part of the foregrip I used a 1” cove bit to cut a smooth channel and tight fit.

Perma blue going on. Happens almost instantly, pretty cool.
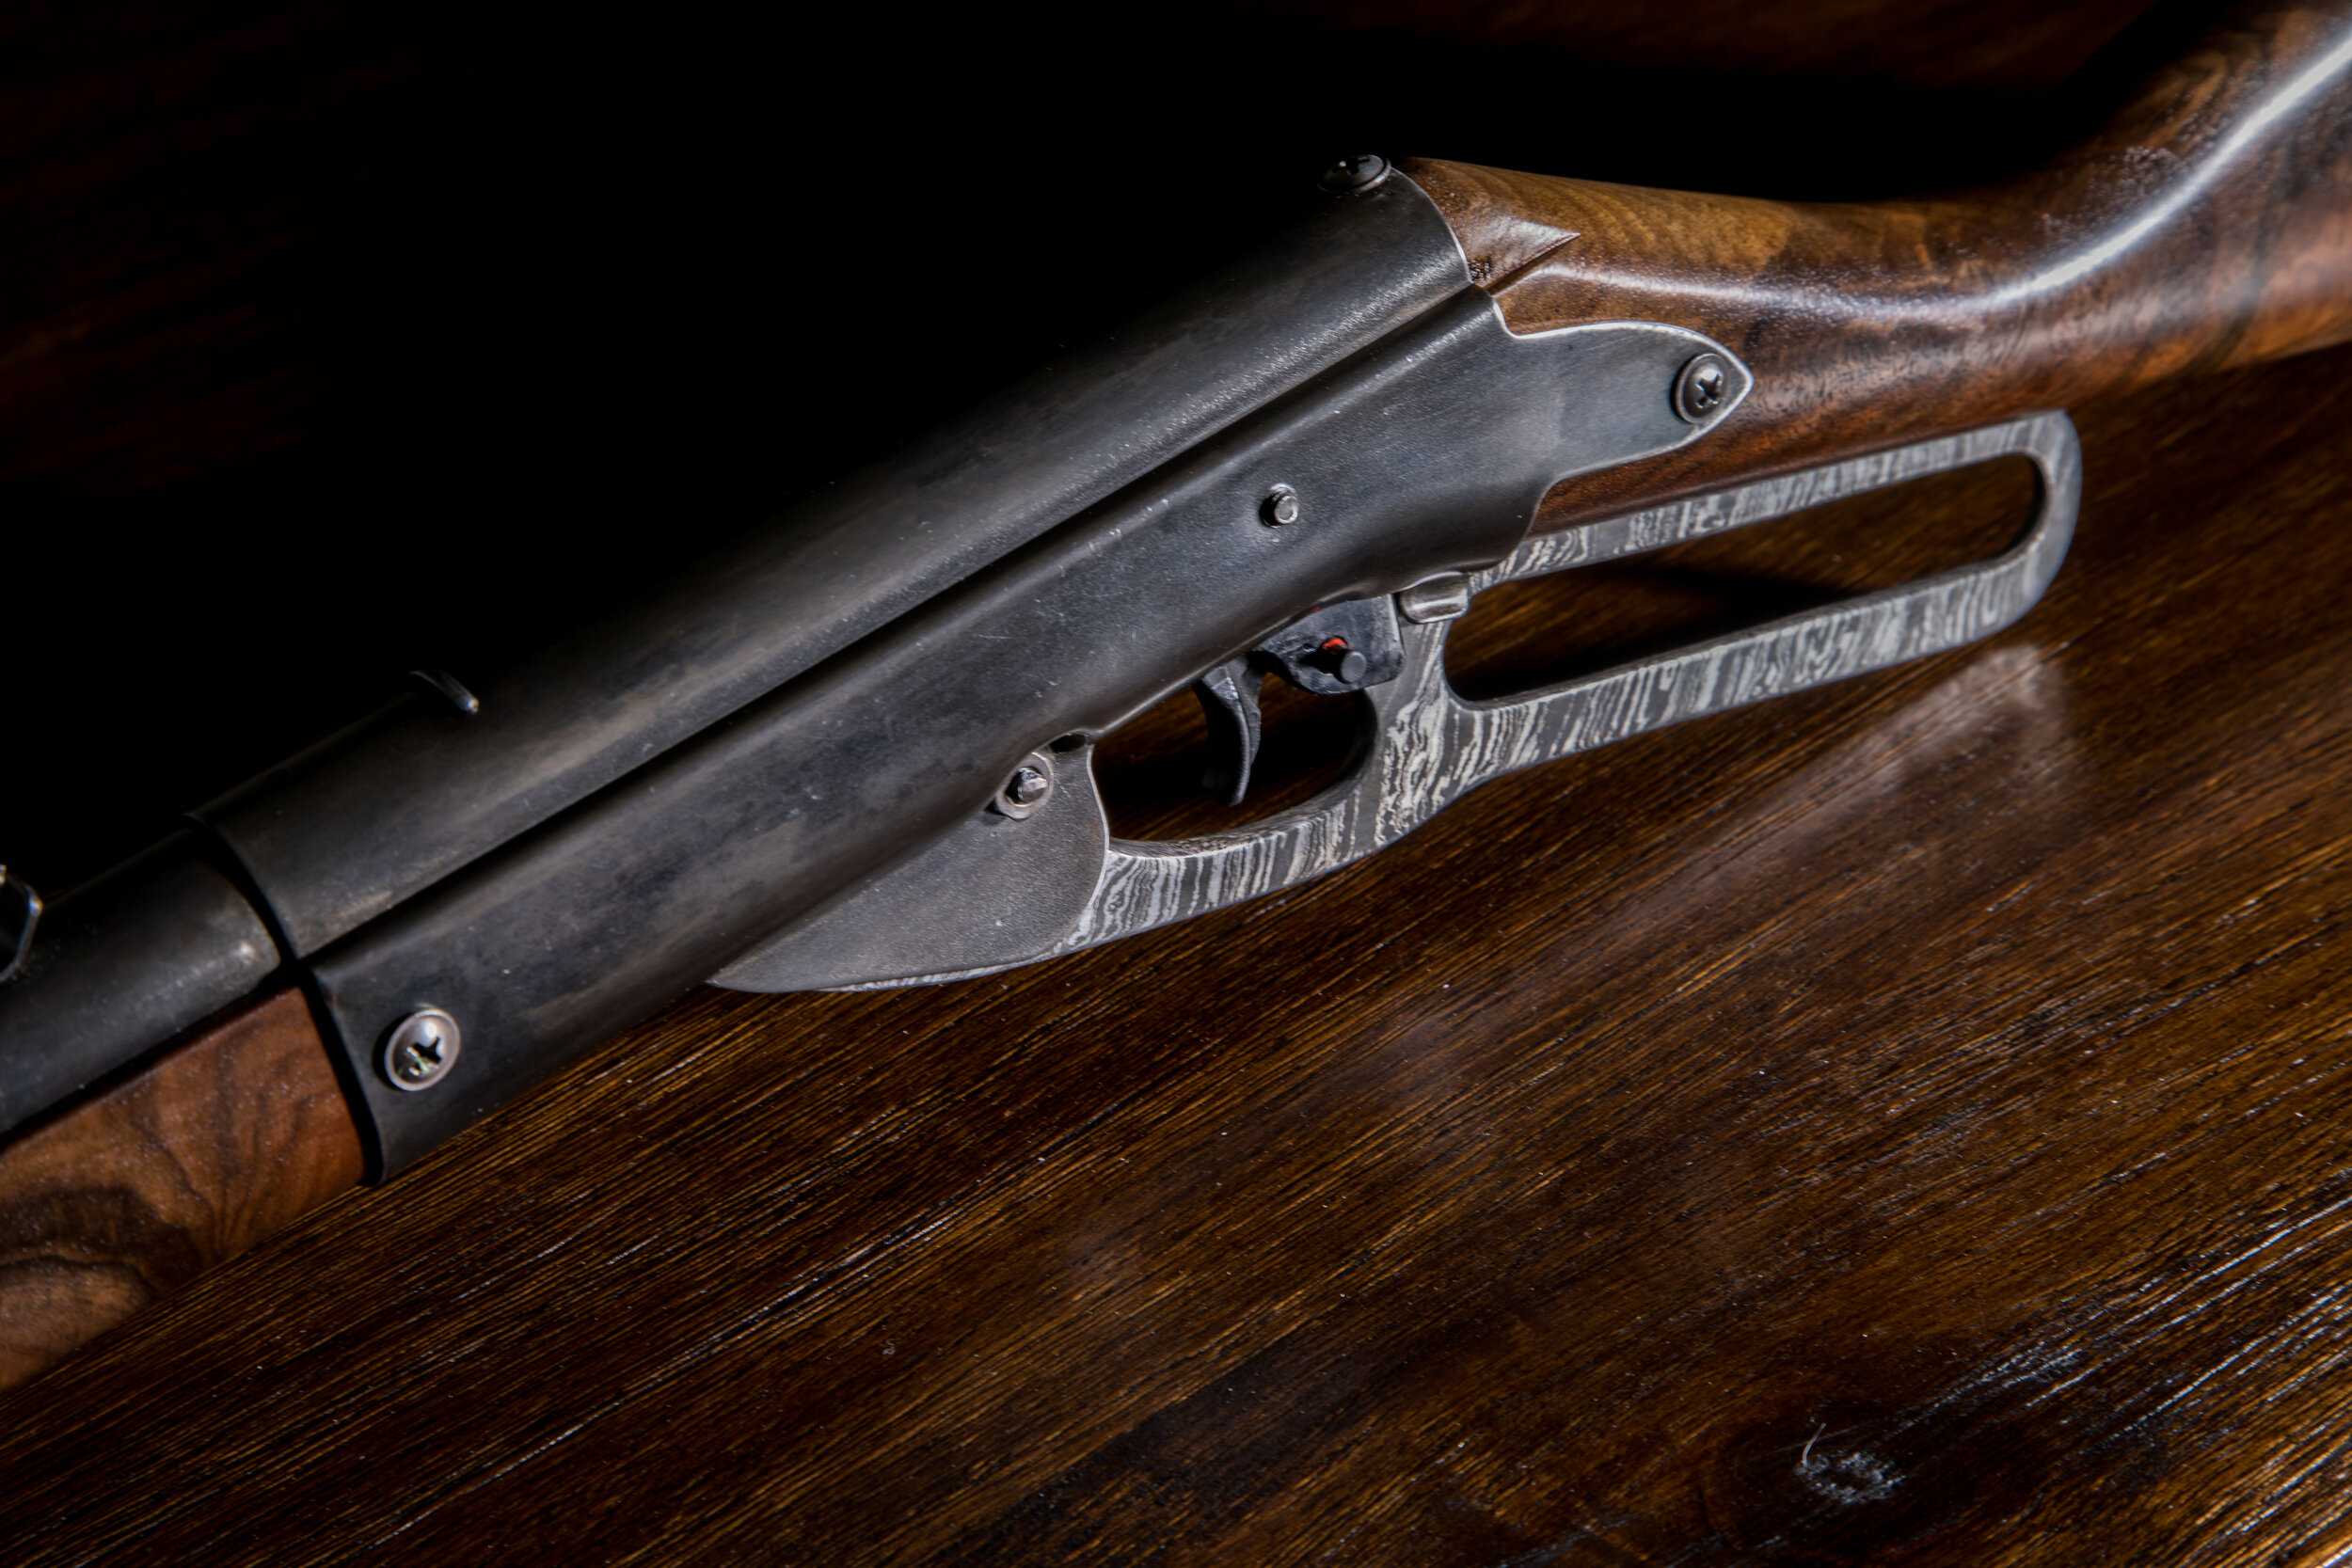
Bluing the barrel
I had never experimented with bluing steel before. So I did a good bit of research before I tried it. The most important thing you need to know is that you need the pieces absolutely sterile before applying any blue. I cleaned everything extremely thoroughly with a rag and denatured alcohol. Making sure to wear nitrile gloves. Any area with a fingerprint will not accept the blue. So make sure you get it perfectly clean.
If you warm your steel slightly with a hair dryer or heat gun the steel will take a deeper/darker blue-black. I didn’t want it to be too dark, so I didn’t warm my pieces. However it wasn’t a perfectly consistent color throughout. I suspect warming the steel would have aided this. I applied my blue with a piece of an old t-shirt. It looked horrible at first, but as I continued to work it in it looked better. After you get your entire piece a good consistent color you are happy with, rinse thoroughly with tap water.
After rinsing and drying, you will see the patina looks a little dull. A quick buffing with 0000 steel wool removed all the flat oxidization and left a really nice smooth dark finish. Just like a new gun barrel would have.
I took this opportunity to blue all my new hardware and screws I was going to use. For this I just dropped my pieces into a cup with a little blue solution in the bottom. Then buffed the pieces with steel wool, just like the barrel. Don’t try this with stainless hardware though. Bluing is actually an oxidizing process that essentially rusts your steel. So it won’t work on stainless.
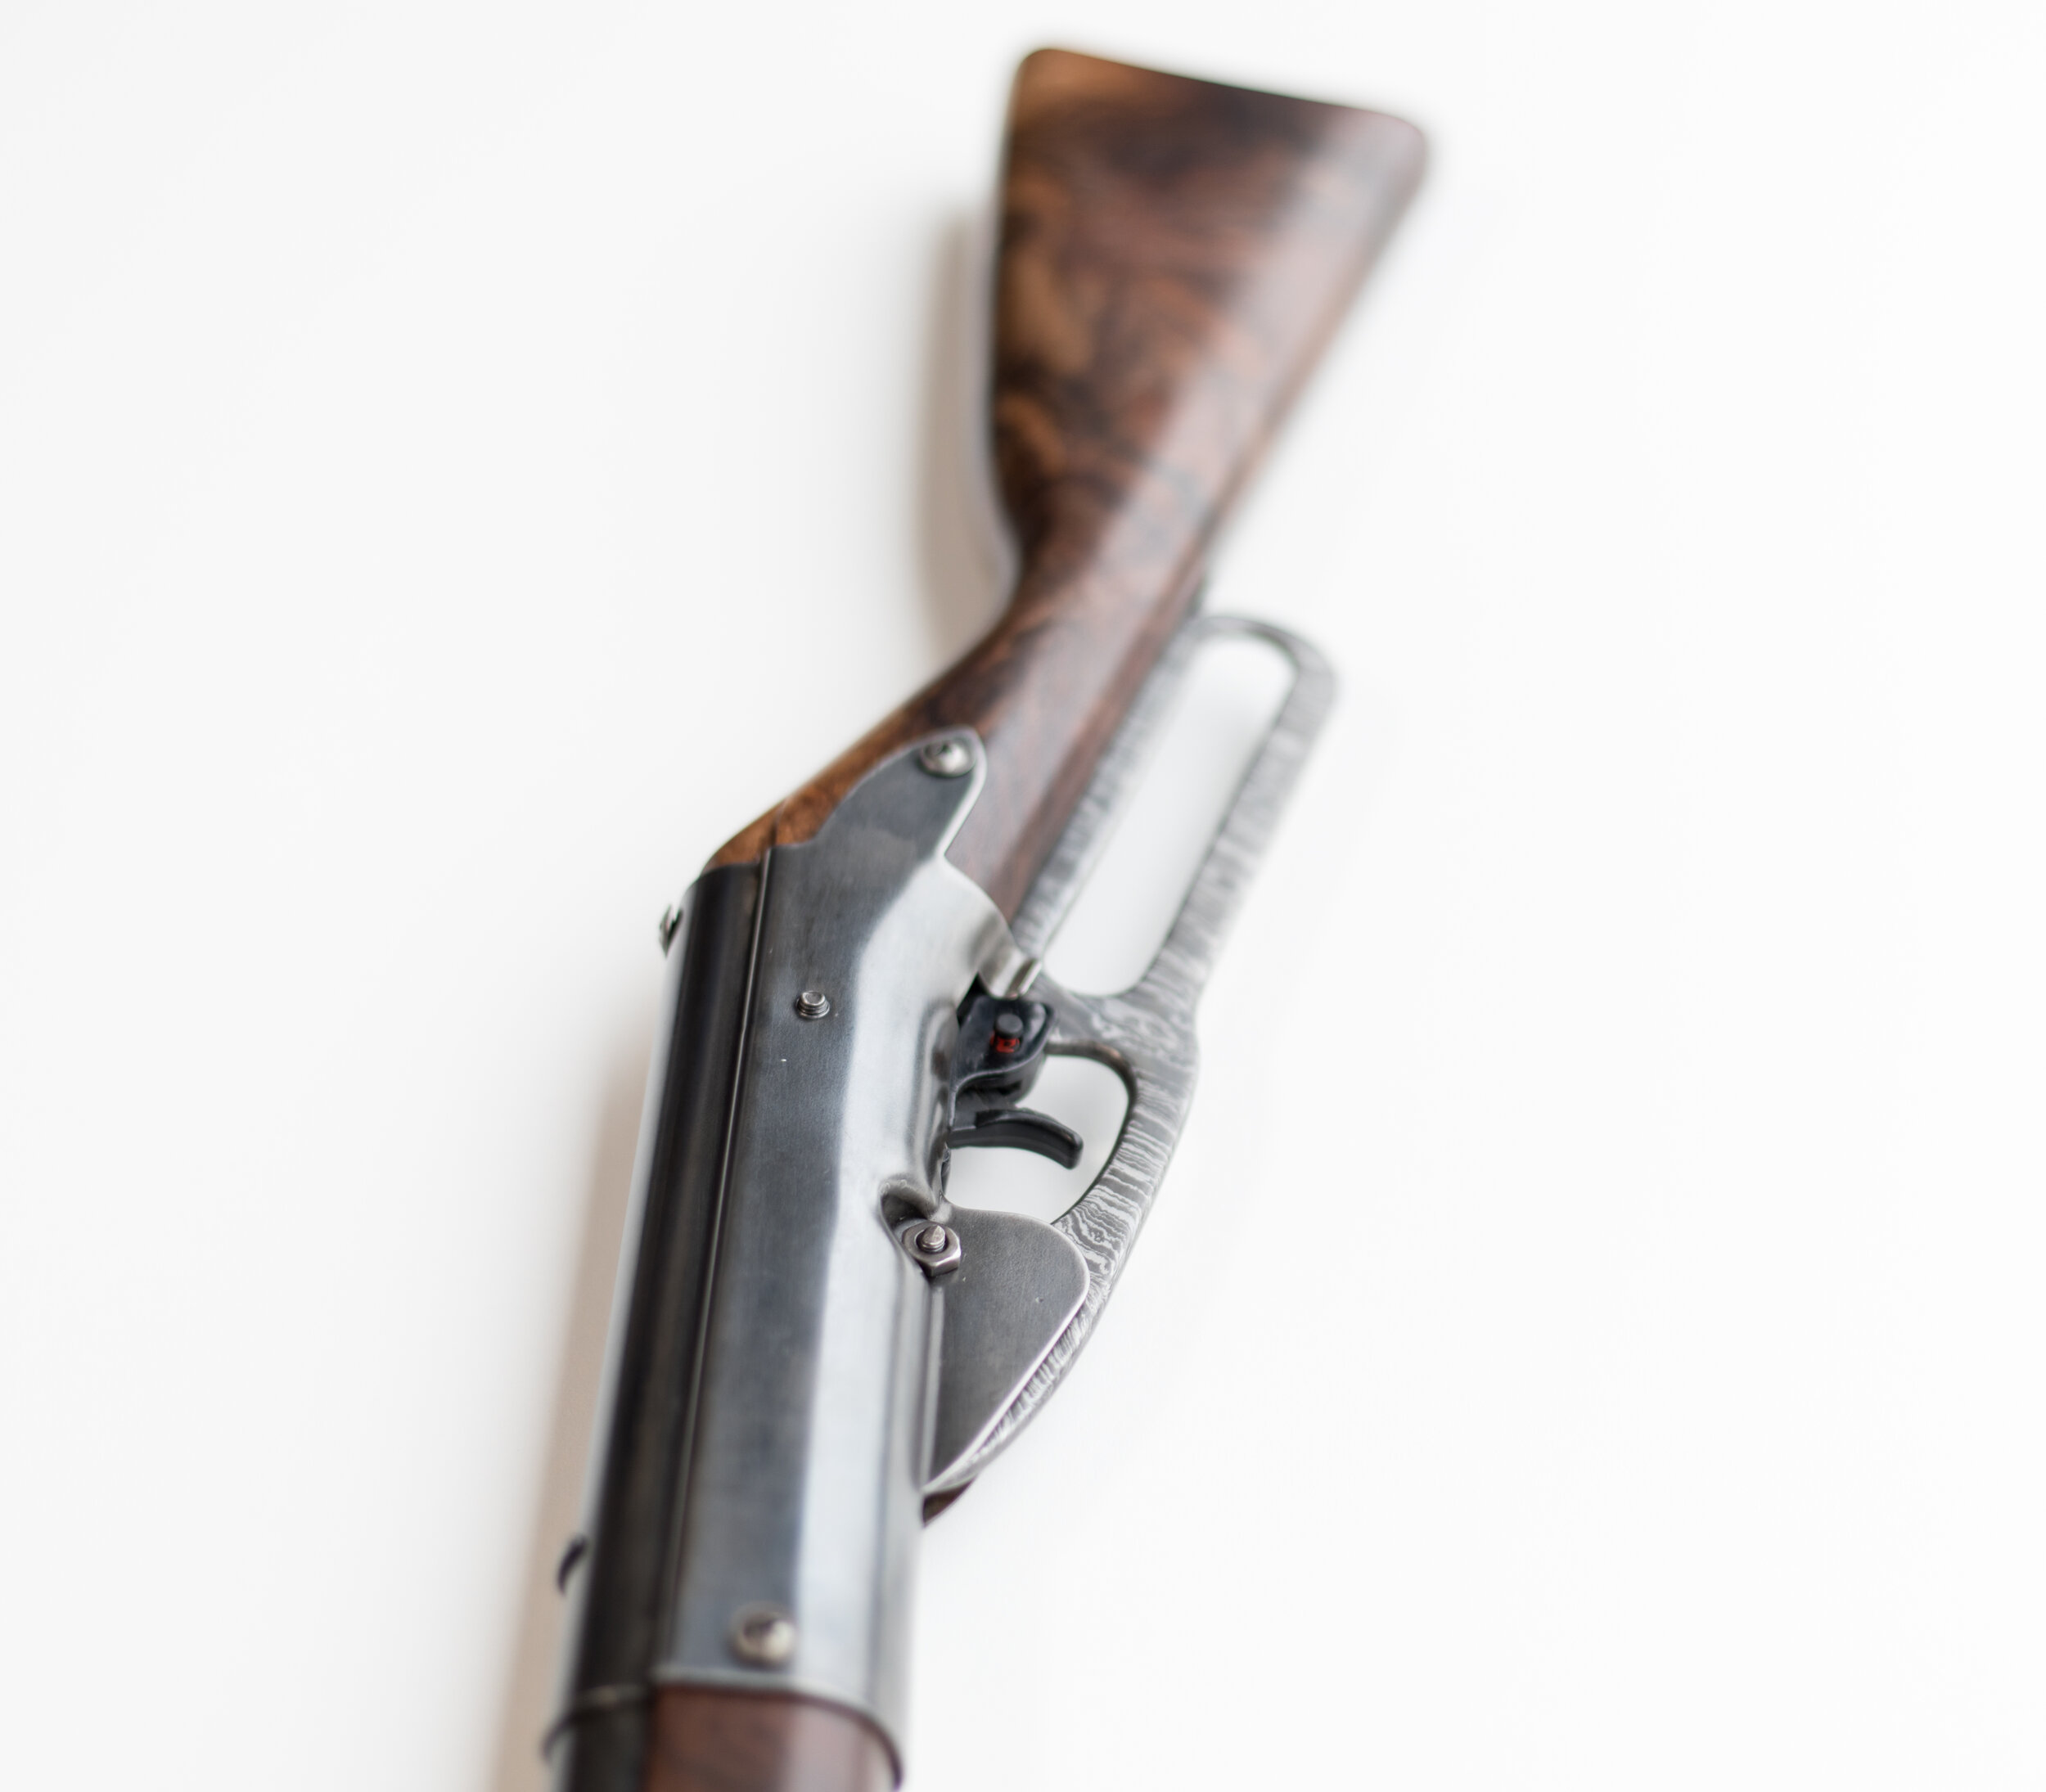
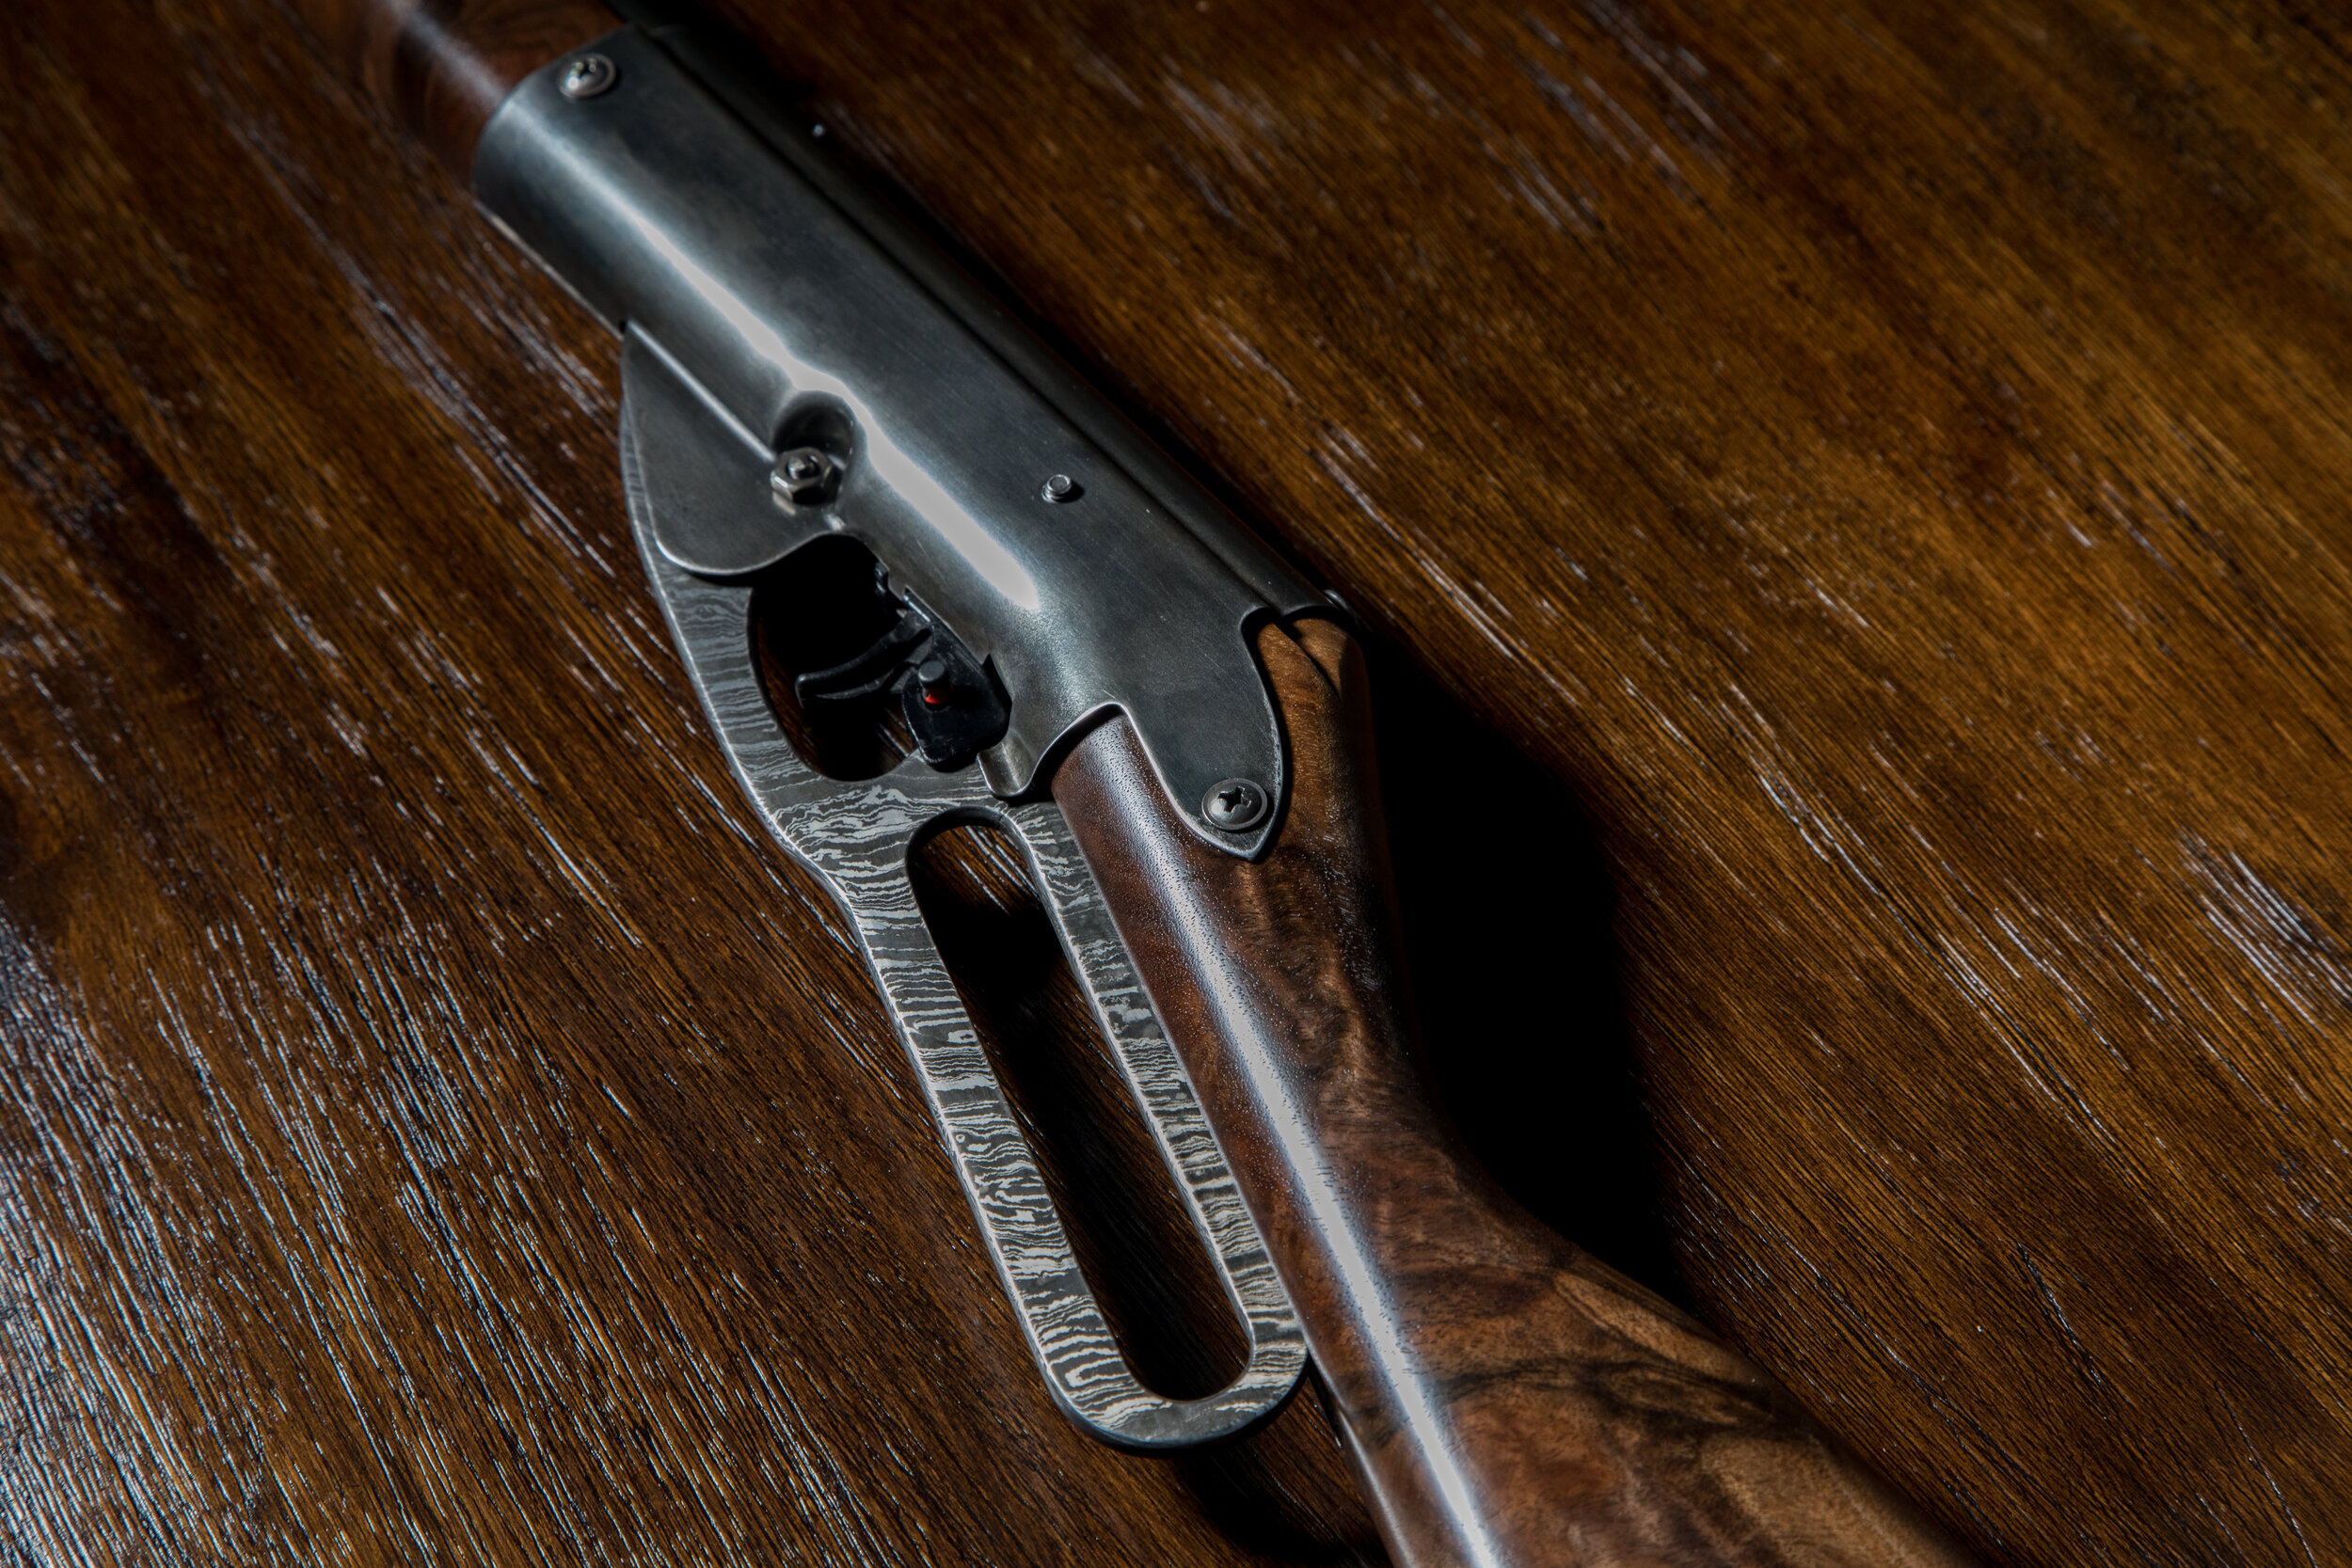
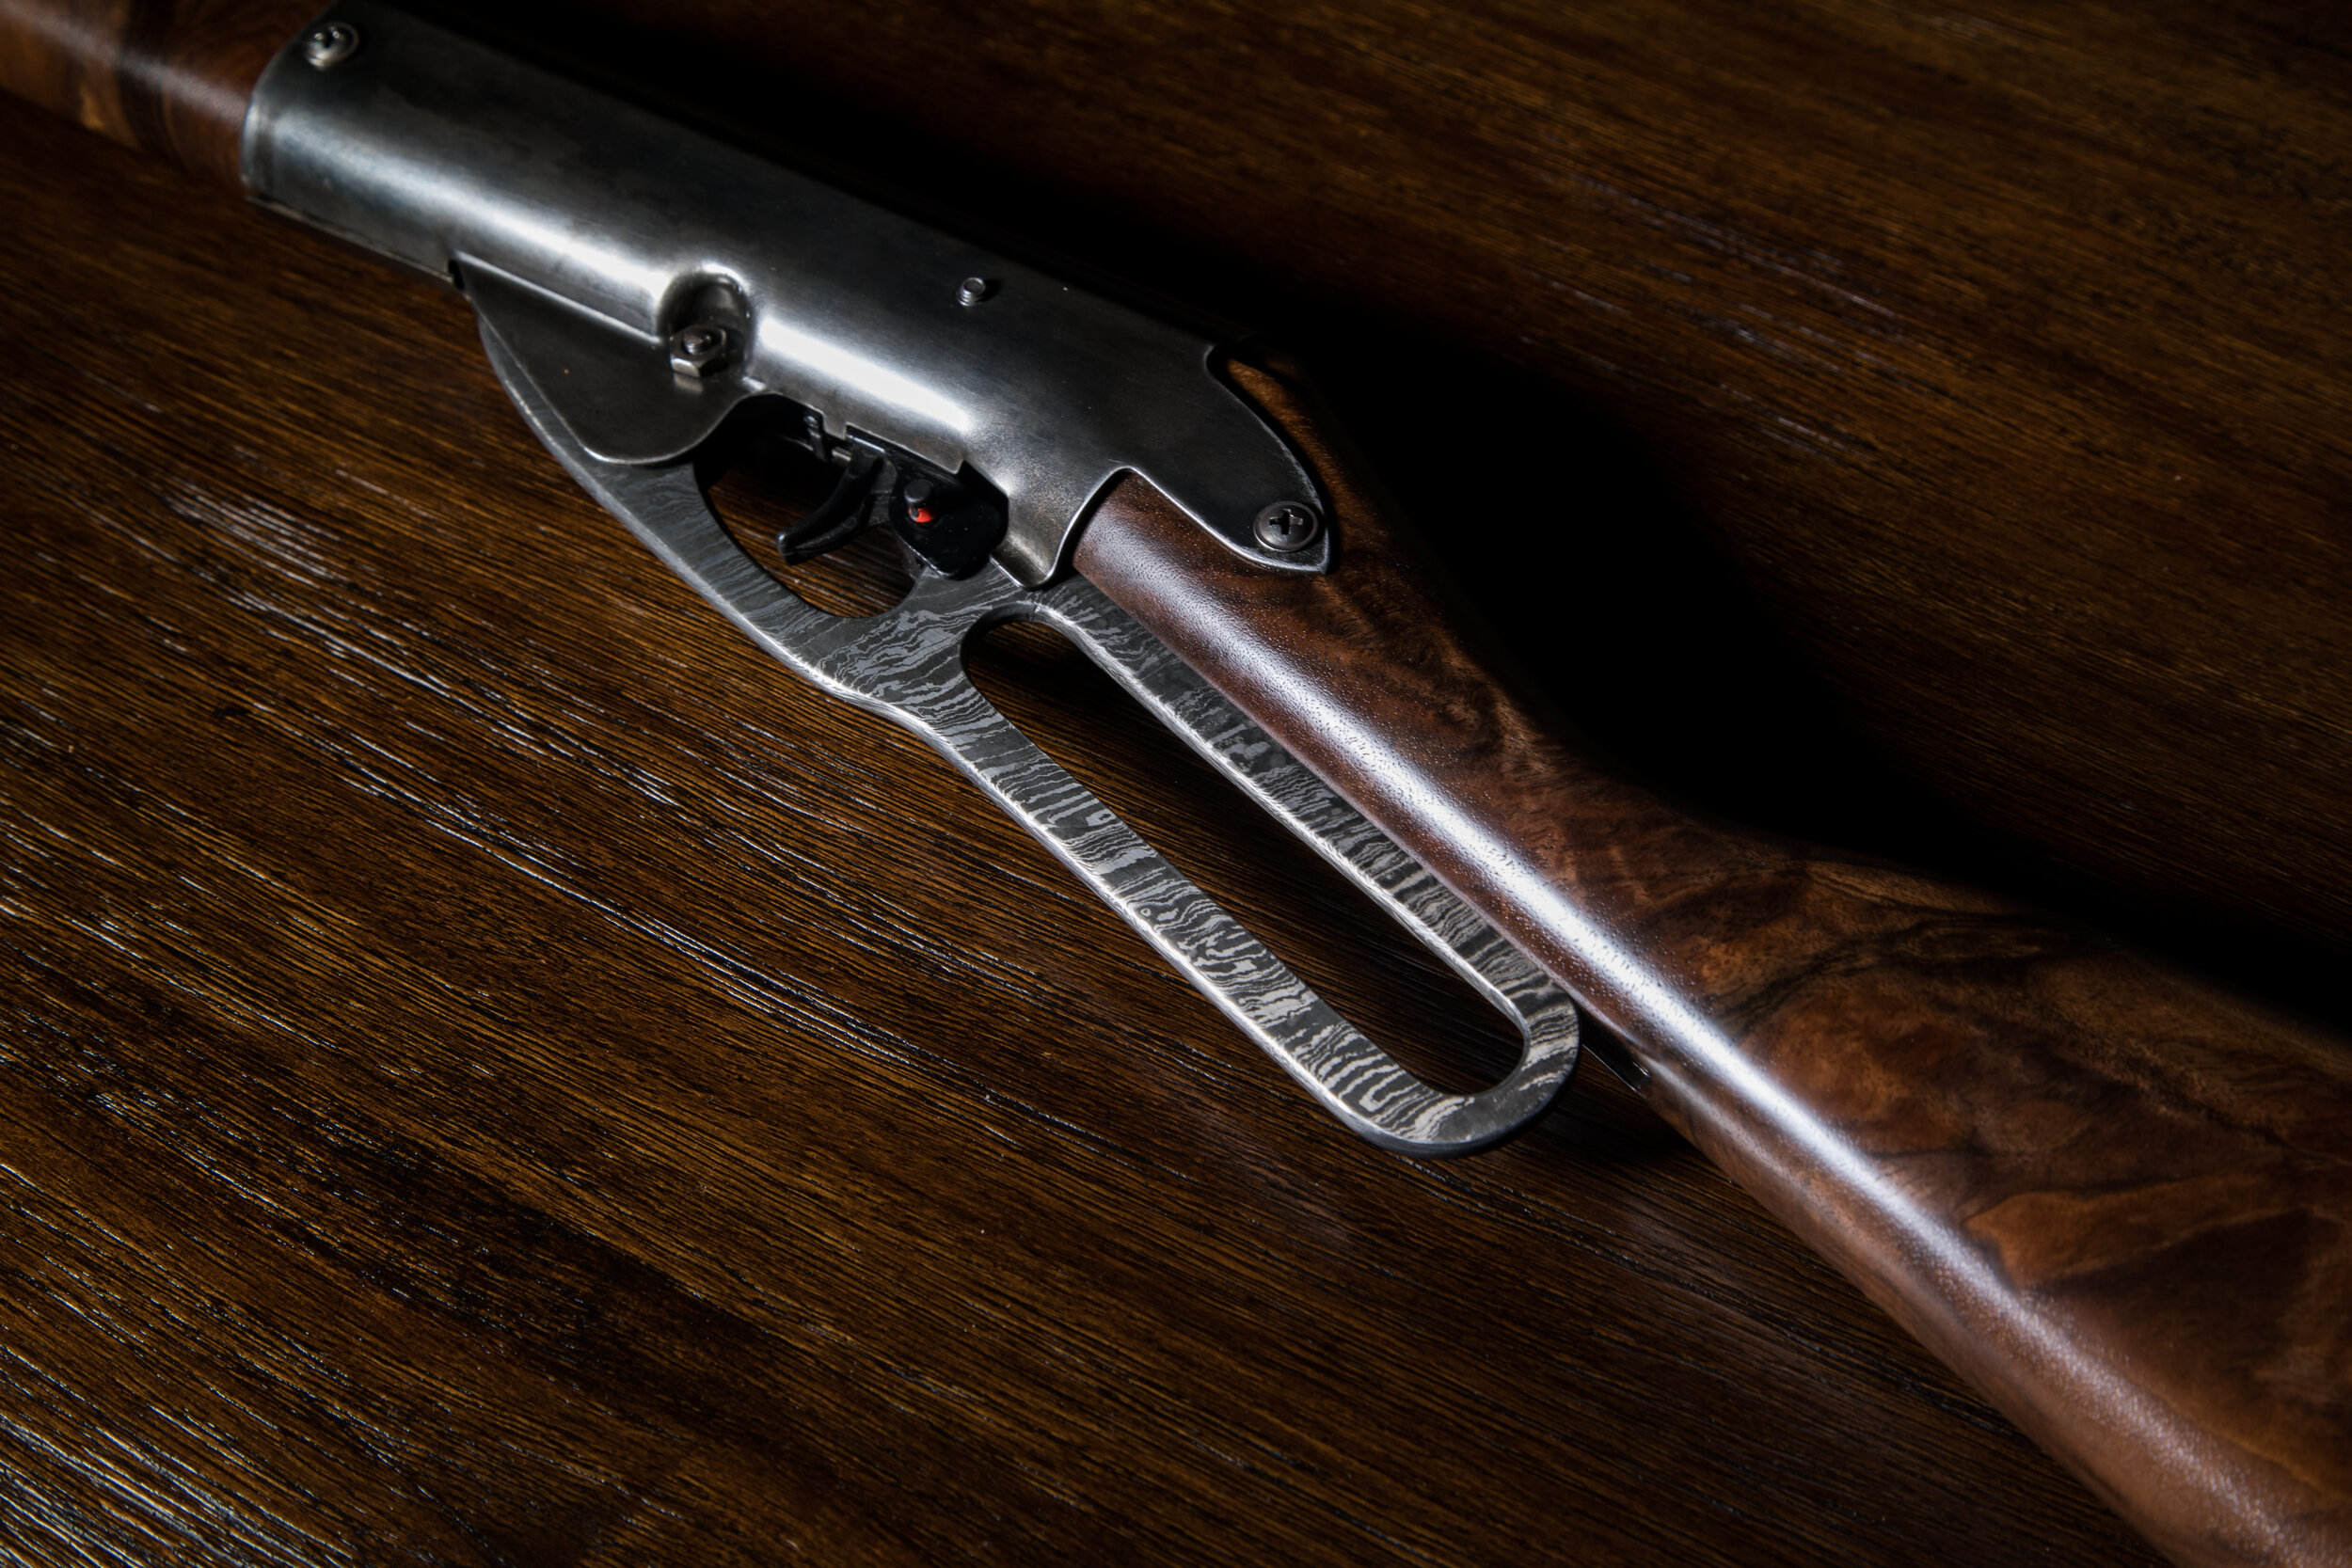
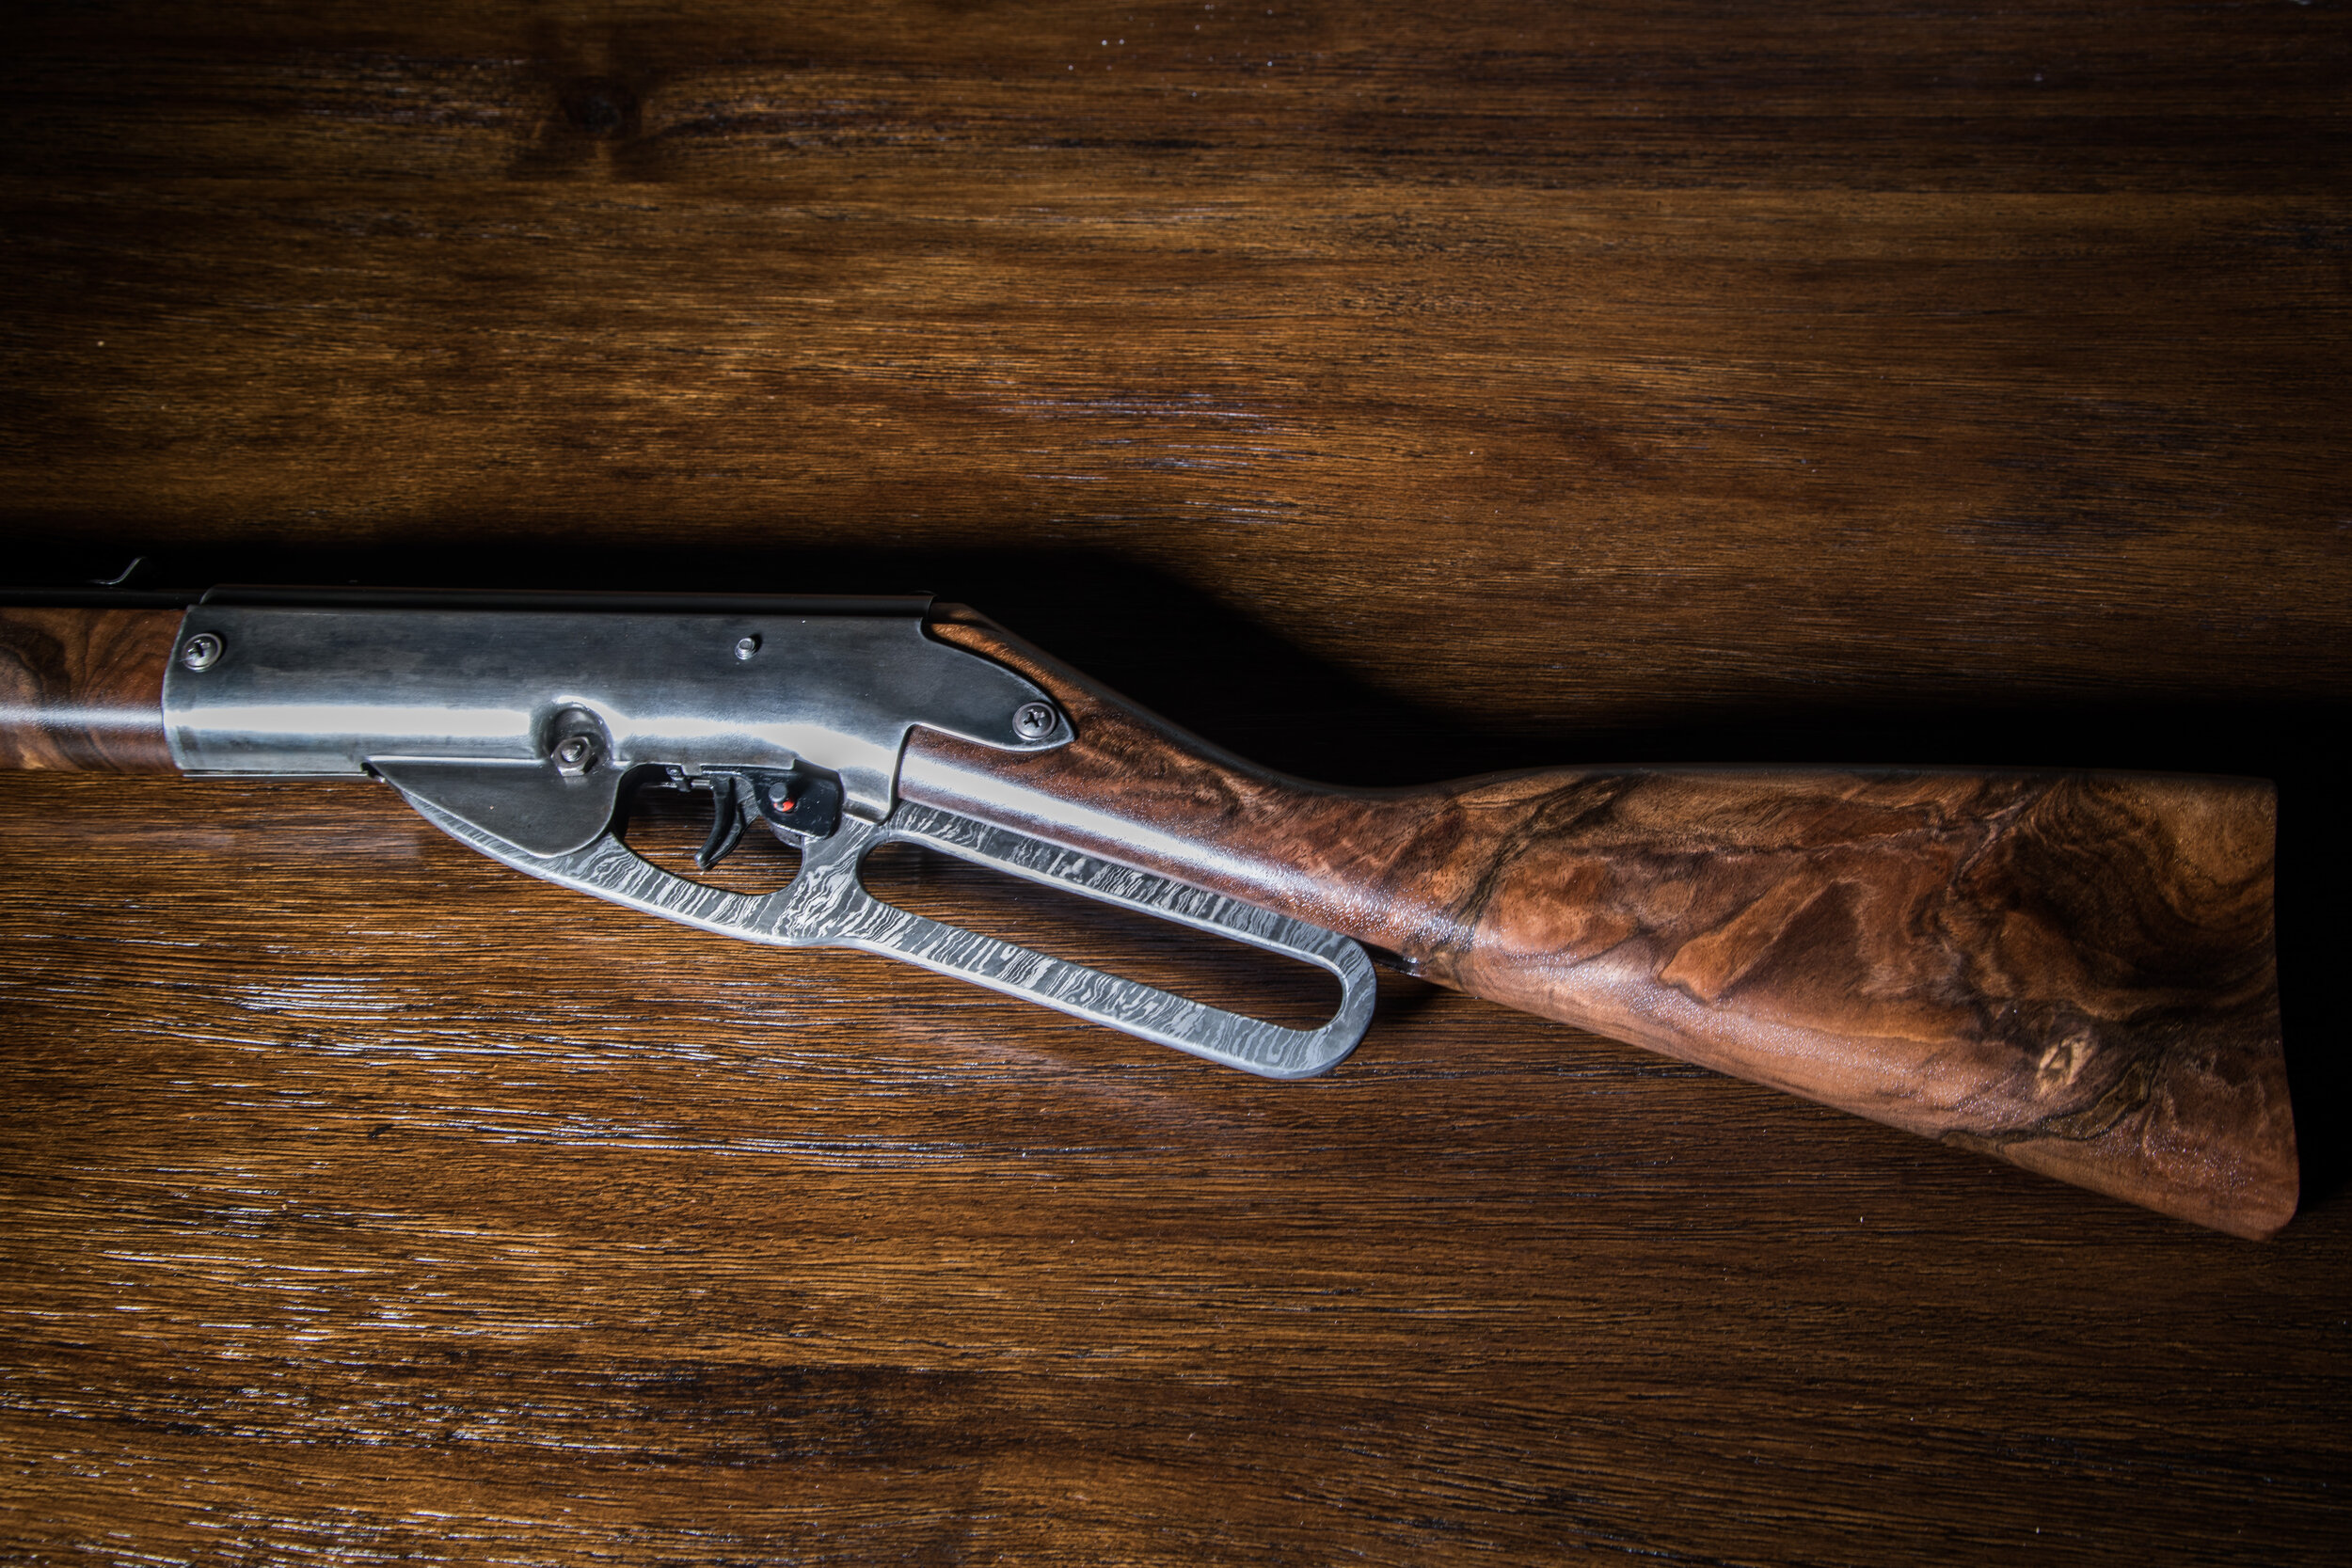
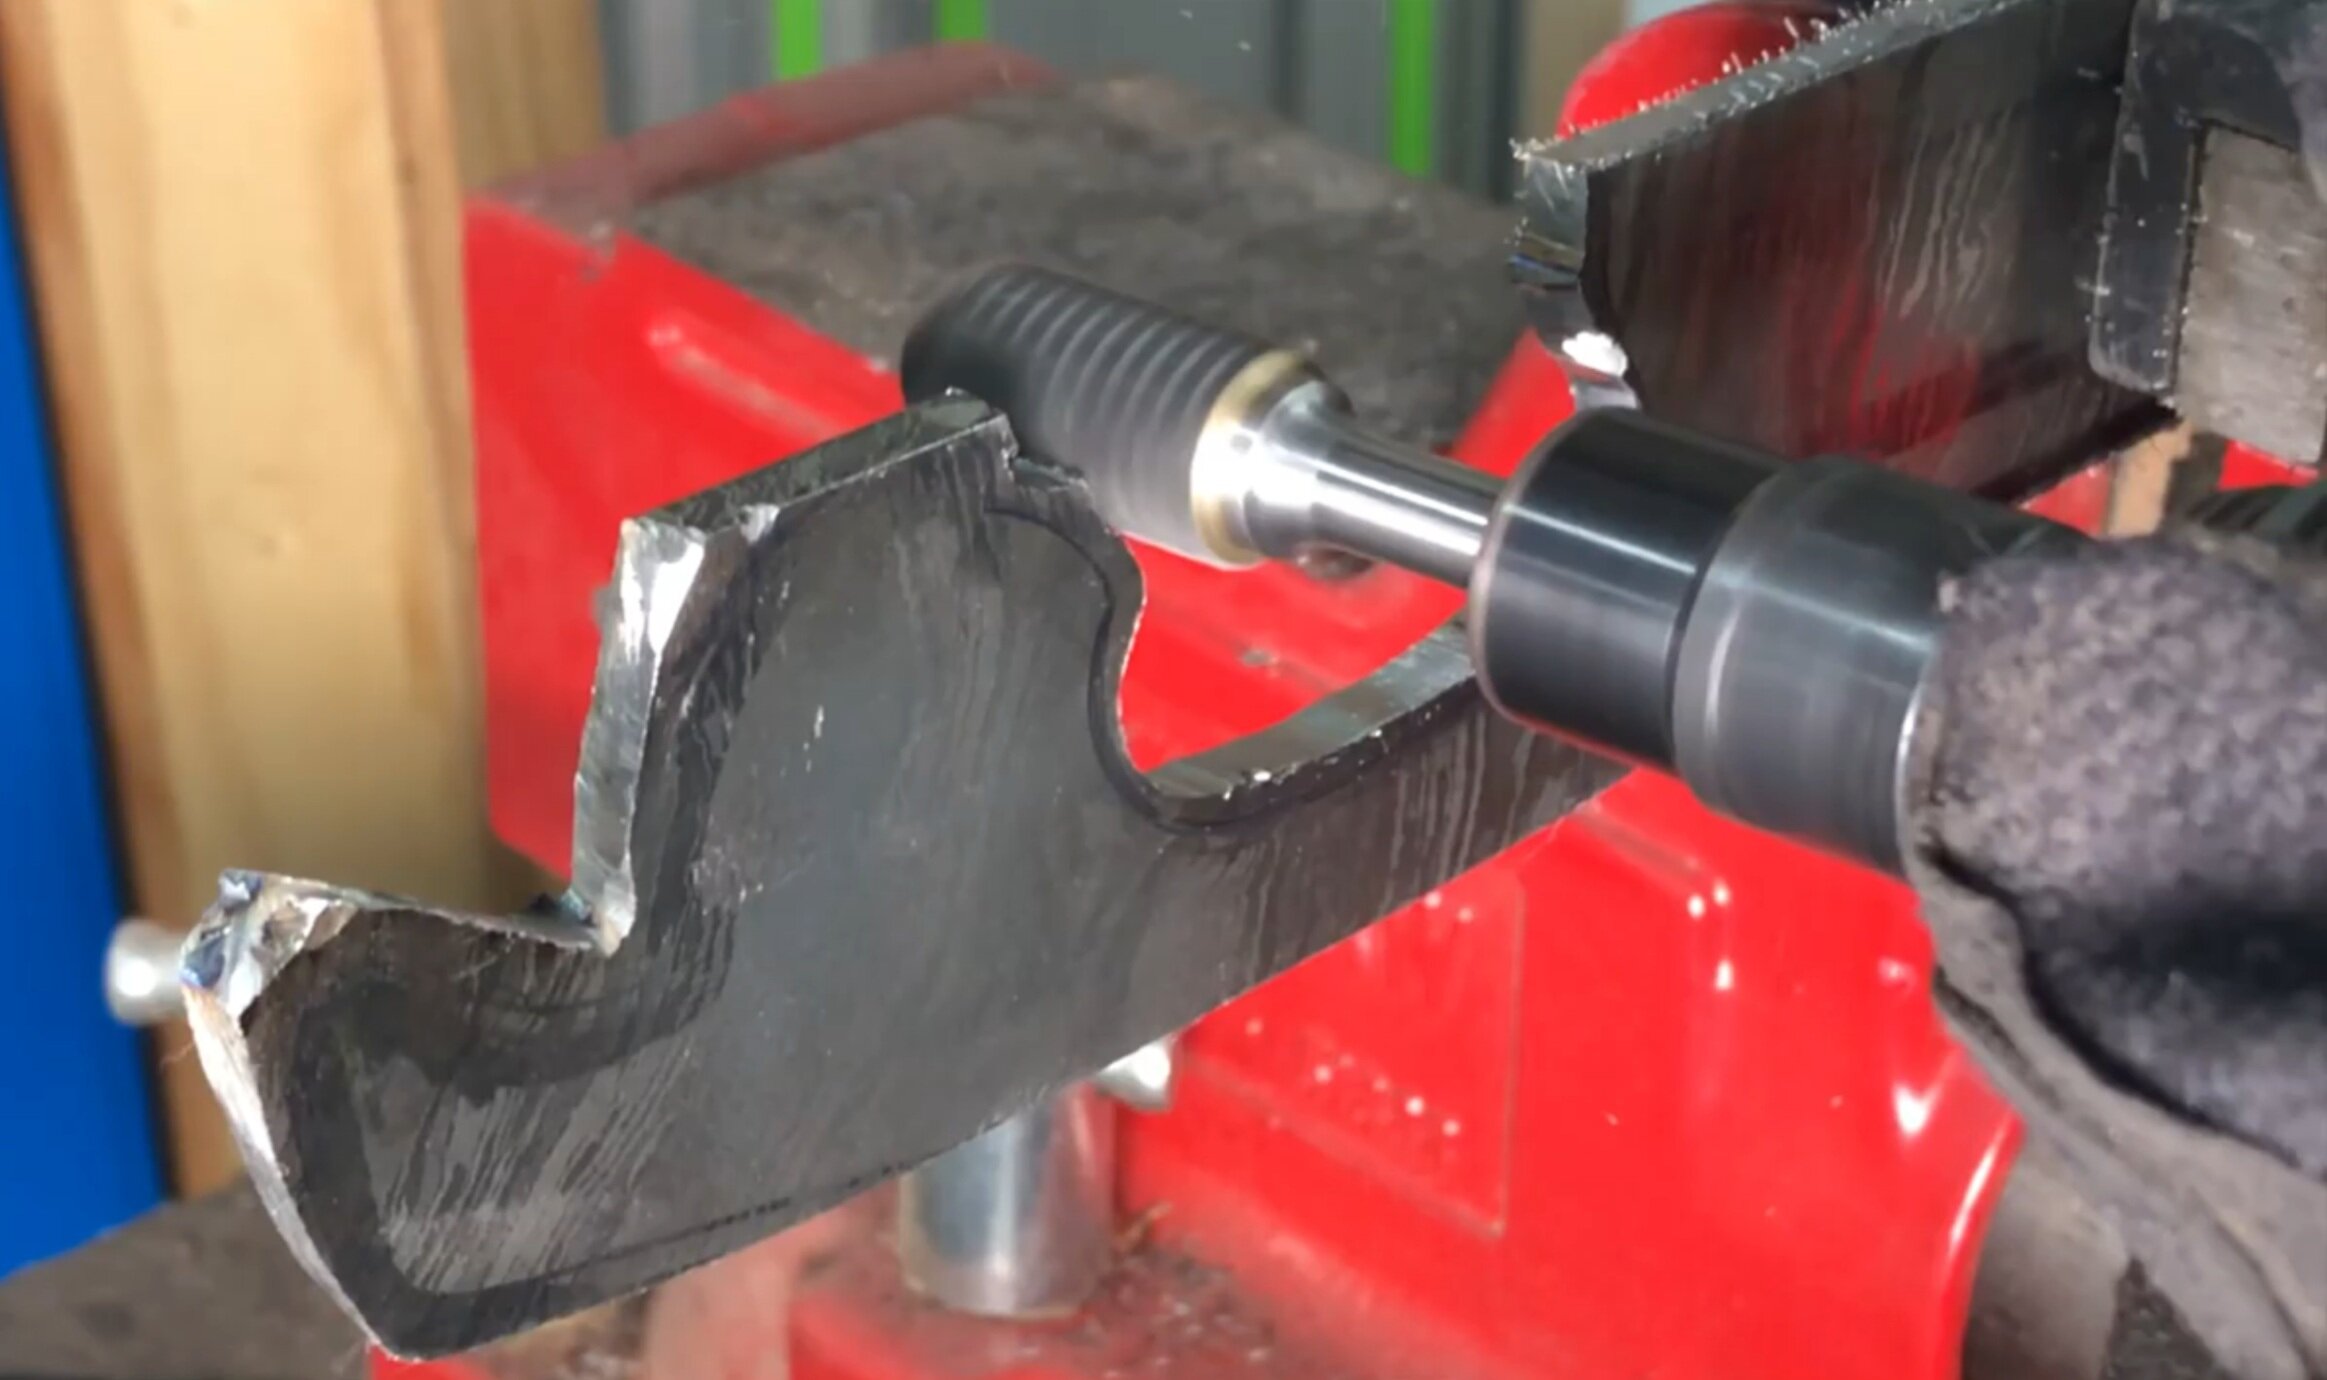
Damascus lever
Die grinder was awesome at cutting the contours
I bought a damascus billet a while ago for a project I never did. When I got going on this project I noticed that it was almost the same size as my daisy cocking lever. I have to admit, I actually thought I was going to spend a ton of time, ruin the billet, and use my original plastic handle in the end. Much to my delight and surprise, it actually worked. It even looked cooler than I expected. There wasn’t too much scientific about this part. I traced the original handle on the billet. Cut it out with my air powered cutoff wheel, then fine tuned it with my die grinder and hand files. That seems pretty simple, and it was kind of. It just took a long time to get it just right.
I knew that etching damascus steel was kind a process. But I figured I could do it pretty easy. I was wrong about that. I tried a bunch of thing that didn’t work. But what eventually did work was a process I found online. Sand any scratches out of your damascus. Mine basically looked completely smooth after I was done. You couldn’t tell it was layered. After that, clean metal thoroughly. Warm muriatic acid in water bath. Soak steel in acid for 20 minutes. Neutralize in baking soda and water. Repeat up to two more times.
After etch mix up a pot (tray) of super strong cheap coffee. Toss the damascus in there and let soak for an hour. Neutralize in baking soda/water after. I actually sealed my piece with Odies Oil when I was done to help preserve the color. That part didn’t even make the video. So bonus info for you for being in the blog club.
Finishing the stock

First coat of Osmo going on.
I sanded my stock and foregrip with my orbital sander as well as hand sanding. I went up to 320 grit and then applied Osmo 3043 with a 3M white pad. Again, that is as much as you got to see in the video. In real life I sanded with 600 grit between coats and reapplied another coat of Osmo. I did three coats in total for a really nice semi-gloss finish.
I like to leave my pieces finished with Osmo to sit for about a week without touching them with my bare hands. I’ve had fingerprints get stuck in the finish when handling a day or two after.
put it back together
One of the great things about these Daisy’s is how unbelievably easy they are to take apart and put together. The only thing I did differently is add a couple nylon washers to my new damascus lever. It snugged it up and kept the metal on metal grinding. It’s actually smoother than the original now.